WSUS maintenance for ConfigMgr

So it was my turn to face problems. I had neglected the obstacle for months excusing myself that everything was still working wonders, until today.

Following screenshot was the reality of my WSUS console when trying to run the server cleanup wizard:

wsuserror

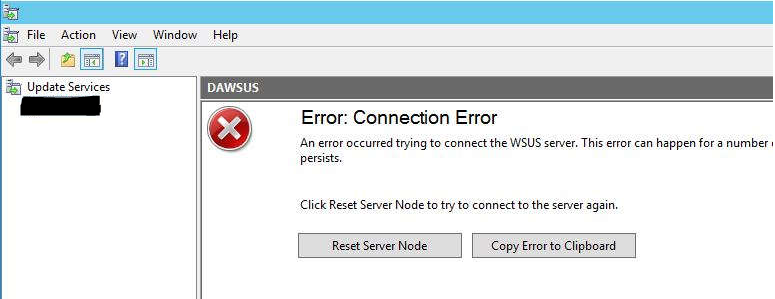
Add so the struggle to solve the problem began and following is the facts and solution:

  • I’m using WSUS running on the internal database in Windows (WID), so I downloaded and installed SQL Server 2014 Management Studio on my server running WSUS
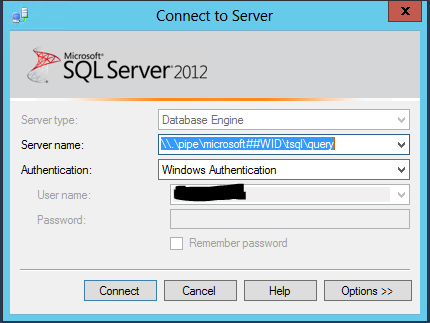
  • Connected to \\.\pipe\microsoft##WID\tsql\query in the Connect to Server window

studioconnecting

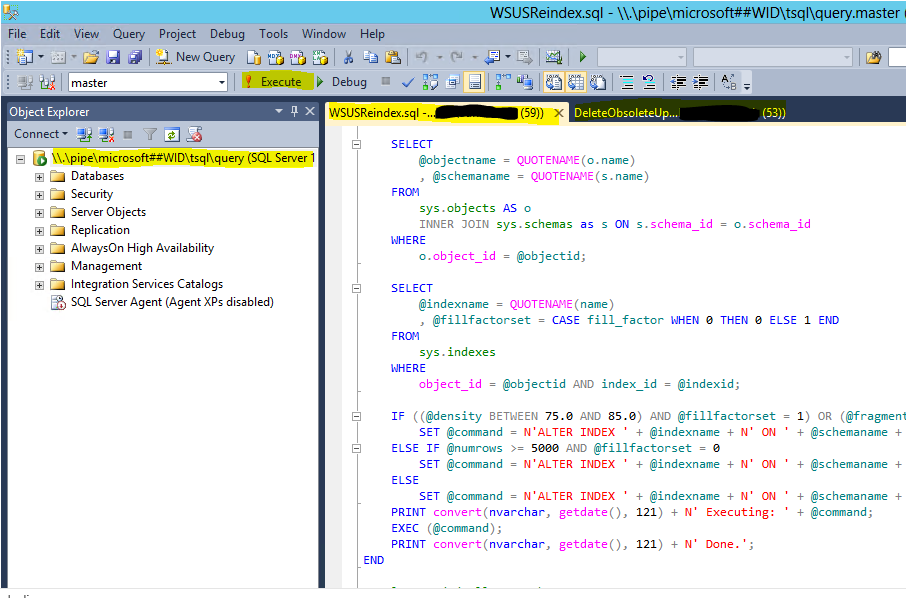
  • Ran the following two SQL scripts. My WSUS DB was so bloated that the reindex script from the scripting guys didn’t cut it. When that happens, the deal usually is that you have to delete updates manually directly in the DB.
    Fortunately for me, I found below script to my aid. The script runs the stored procedure EXEC spGetObsoleteUpdatesToCleanup and then deletes the updates. Beware, running these scripts may take several hours depending on the specs of the server and the amount of updates)
  1. DeleteObsoleteUpdates
  2. WSUSreindex

This is a snip of the two scripts showing directly in Management Studio, saved for later use as .sql.

studioscripts

Lesson learned:

Maintaining the SUSDB is important, and is not just something you setup and leave even though running it integrated with ConfigMgr.

**Will update this post on how I’m going to automate this in the future.

How to flash BIOS with SCCM during OSD (Lenovo ThinkPad laptop)

Note: June 3 2018: This post will be updated as soon as possible with some minor changes and reflect how I do this today 🙂

In this blog post I will go into details about how I flash the BIOS of our Lenovo ThinkPad series during OSD using ConfigMgr.

First off you obviously need to download the latest BIOS from the Lenovo support site: http://support.lenovo.com/dk/en/. In this example I’m flashing the BIOS of a ThinkPad T450s.

Go ahead and locate and download the BIOS Update Utility for Windows. The most recent version as of now for T450s is 1.21:

T450BIOS

When downloaded, extract the content to your source file library. In this case I have a folder structure equal to this: D:\Pkgsource\Applications\Lenovo\BIOS\T450S\1.21

The content of the 1.21 folder should be looking like this:

T450BIOS2

Next, mind the highlighted file: FlashBIOS.cmd. Create this file manually with following content (I exit the script with exitcode 0, as the BIOS update itself might return exitcodes seen as failures. Some might dislike this approach, but you can also translate the actual exitcode into zero using whatever method you prefer):

“%~dp0WINUPTP.exe” -s
exit 0

T450BIOS3

With this in place, go ahead and create a package in ConfigMgr with above content and distribute the package to your distribution points (I’m not going into details on this one, as this is pretty standard).

My packages in ConfigMgr looks like this (I have highlighted the package used in this example):

T450BIOS4

Next we will be using the package in our task sequence in a step of Run Command line. This is done somewhere after the step of Setup Windows and Configuration Manager like this (I put BIOS updates in the end of my task sequence as they require reboots):

T450BIOS5

As updating the BIOS to this specific version is a onetime operation, you would want to add following conditions to the Options tab:

T450BIOS6

This will make sure that the step is only run when a Lenovo Thinkpad T450 is being deployed AND when the BIOS is not already the most recent version (no need to run the step again, if the same laptop should be reinstalled in a near future)

You can run following powershell commands to display the computermodel and what BIOS version that currently is installed:

Get-WmiObject Win32_Computersystem

Get-WmiObject Win32_BIOS

T450BIOS7

Enjoy 🙂

Update 1602 for System Center Configuration Manager Current Branch

So, Update 1602 is out for SCCM Current Branch and I just updated my environment.

The new 1602 update is available from within the SCCM console, browsing: Administration > Cloud Services > Updates and Servicing. Right Click the update and select Install Update Pack.

1) Click next on the general page.

1

2) Select the desied features to be included.

2

3) Options for Client Update. I decided to test the new SCCM client on a selected test collection at first.

3

4) Finish the wizard and accept the license terms.

4

5) Go watch CMUpdate.log and wait for following line in the log: INFO: Successfully dropped update pack installed notification to HMan CFD box which translates into installation is complete.

6

Notes from the field:

  • I ran the pre-requisitecheck on the 1602 update before installing. Doing so required me to restart the SMS_EXECUTIVE service on the site server before the actual installation would continue. The status in the console was stuck on Installing, but nothing happened until the restart of the service. (CMupdate.log)
  • I decided to test the new client on a pre-production collection. Doing so actually did that the client binaries wasn’t updated (\\Siteserver\SMS_SITECODE\Client). To update the client binaries, you have to go back to the 1602 update in the console and accept the new client for production in Client Update Options. Yet again, I had to restart the SMS_EXECUTIVE service to see any action in CMupdate.log.

5


How to renew Apple Push Certificate for Intune (Hybrid SCCM)

It’s that time of year, where I have to renew my Apple Push Certificate for Intune. And like every other year, I keep forgetting how I did previously.

So now it’s time to put it down in writing. Here goes:

  • First off you have to create a signing certificate. You do that directly in the CM console: Administration > Cloud Services > Microsoft Intune Subscriptions. Click Create APNs certificate request in the ribbon and save the .csr file.

RequestApplePushRibbon

  • Secondly you have to upload the request to the Apple Push Certificates Portal: https://identity.apple.com/pushcert/. Go to the portal and renew your existing certificate.

PushPortal

  • Thirdly, upload the signing certificate (.csr) you just created in the first step and your certificate has been renewed. Download the renewed certificate. This is a file with the extension of .pem; MDM_ Microsoft Corporation_Certificate.pem
  • Finally, go back to your CM console: Administration > Cloud Services > Microsoft Intune Subscriptions. Click Configure Platforms in the ribbon, and select iOS in the dropdown menu. Browse to the location of your .pem file and open it.

IntuneSubProperties

  • Done. The certificate has been renewed

ConfigMgr 1511 – Notes from the field

I just updated my ConfigMgr environment to 1511 (CurrentBranch) and while the installation itself went safe and sound, following is to be noted:

  • The new Software Center never got installed properly with a shortcut in the start menu (%ProgramData%\Microsoft\Windows\Start Menu\Programs\Microsoft System Center\Configuration Manager)
    I had to re-enable the setting in my Client Settings (Disable the feature, OK, Enable the feature, OK and do another policy refresh)

ClientSettings

  • None of the new Windows 10 1511 software updates was synced into SCCM. I checked WSUS manually, and the classification Upgrades was not selected regardless of the Upgrades being indeed selected in SCCM. To solve this, I had to de-select all classifications in SCCM and select them again on the Software Update point. When I checked the chosen classifications in WSUS again, the proper selections was inherited from SCCM as expected and the next sync downloaded the Windows 10 Upgrades.

Classifications