Introduction
Patching 3rd party applications can be a trivial and time consuming task, especially if doing everything yourself in terms of downloading the application, customizing for the enterprise, creating applications/packages in SCCM and.. the list can probably go on.
Does above sound familiar? Patch My PC made this task super easy and combined with the latest additions to SCCM 1806, the complexity in setting this up has been reduced to almost zero. Curious? Continue reading and be amazed 🙂
Patch My PC
There are two options in how you can put Patch My PC’s third-party software update catalogs to use when running SCCM 1806 or later:
- Use the catalogs with the native Third-Party Software Updates feature in SCCM 1806
- Use Patch My PCs publishing service
Prerequisites
When using either option, there are a few prerequisites for setting this up:
- First off is to enable Third-Party updates on your Software Update point in SCCM. See below.
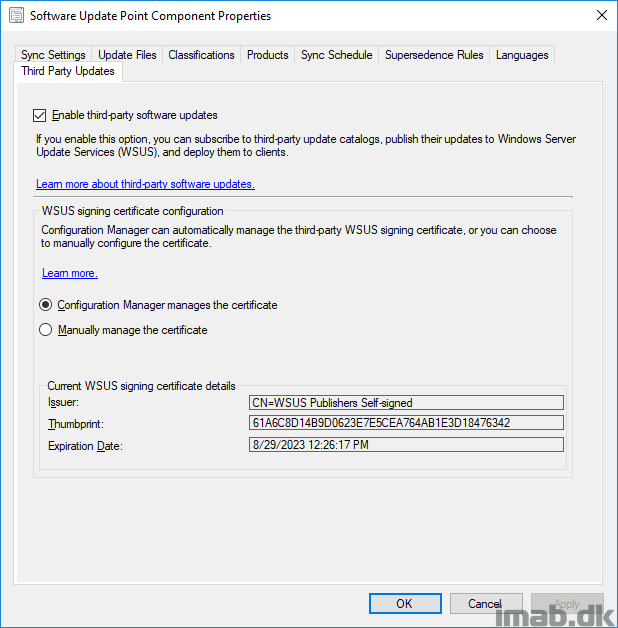
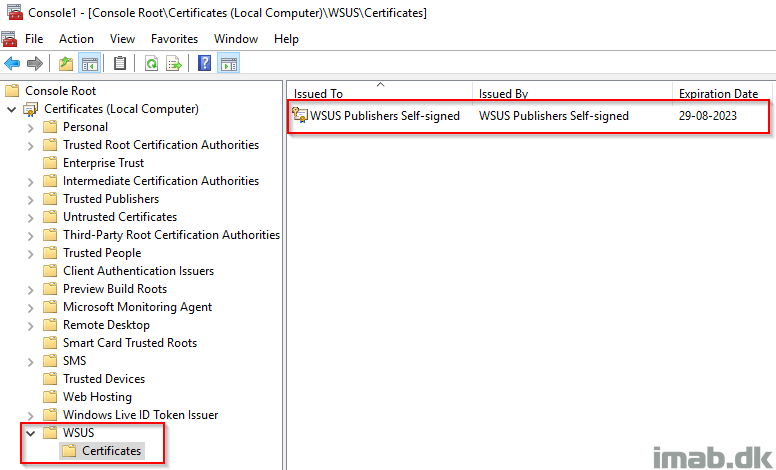
- I’m going to let Configuration Manager manage the certificate. This will automatically generate a self signed certificate (upon next Software Updates synchronization) that Configuration Manager will deploy to your clients. You can view the certificate in a Microsoft Management Console (MMC) as well as in the SCCM console. See above and below illustrations.
NOTE: Prior to 1806 there was an additional requirement to having WSUS running in HTTPS mode. This is now only required if your WSUS is running remote from the top-level site server. As of such, you can leave your WSUS running on port 8530 (default port for HTTP). See: https://docs.microsoft.com/en-us/sccm/sum/deploy-use/third-party-software-updates
Client Settings
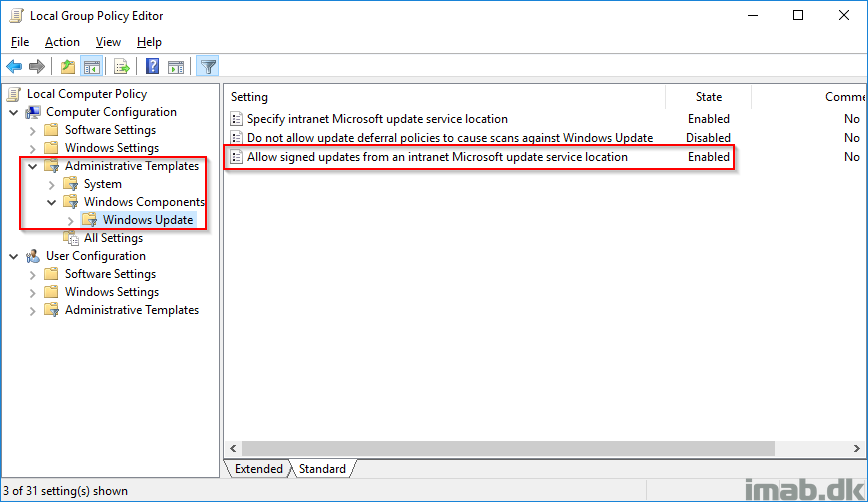
- Another requirement is to Enable third party software updates in your client settings (and obviously have those client settings deployed to your clients).
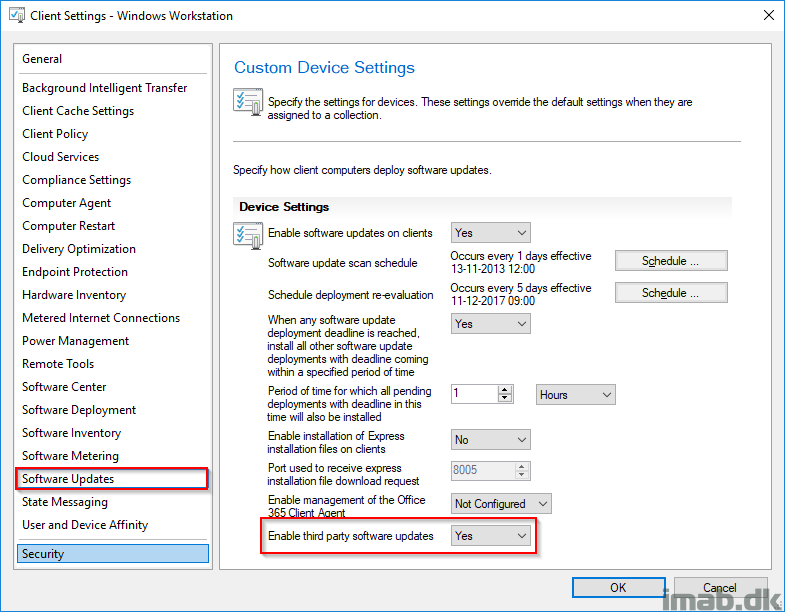
This will create the local group policy to Allow signed updates from an intranet Microsoft update service location. If you bring up gpedit.msc, you will find the policy Enabled as illustrated below.
Option 1
With above prerequisites in place, you will be ready to move on. Option 1 will be how to use the new built in third-party update functionality. I have previously made similar walk through, but for good measures, I will do the exact steps required.
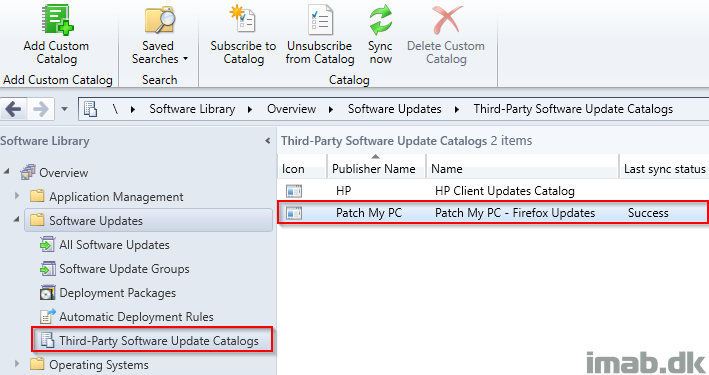
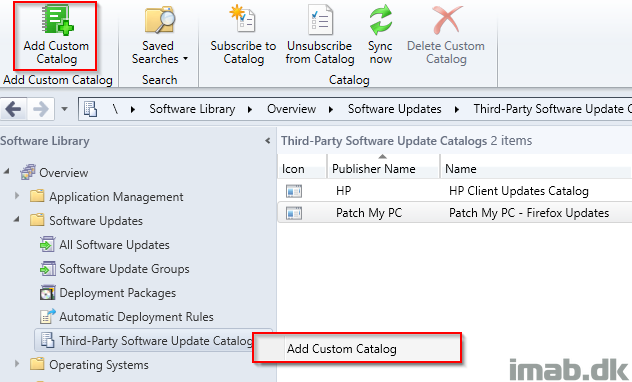
- Select to Add Custom Catalog, either in the ribbon or by right clicking on Third-Party Software Update Catalogs
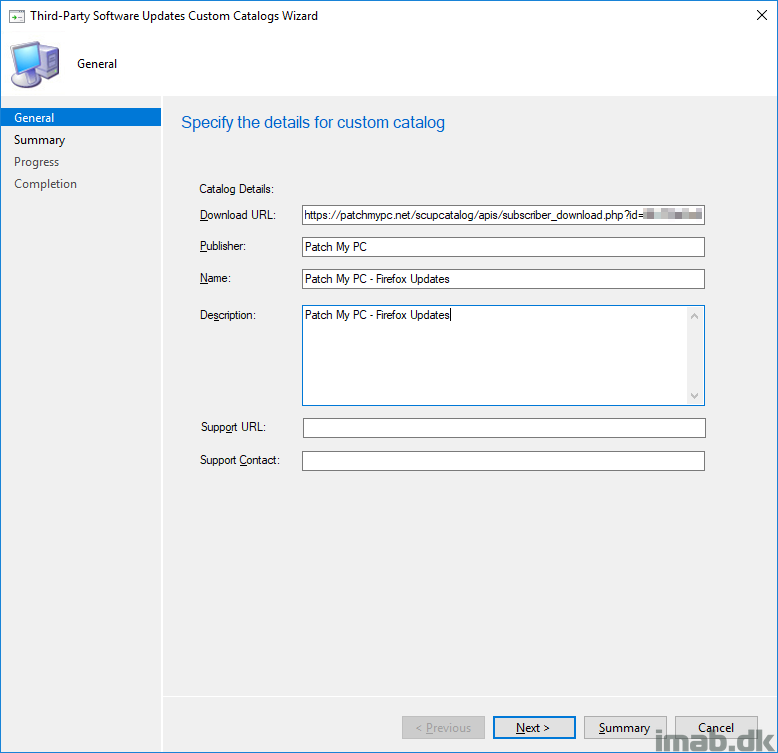
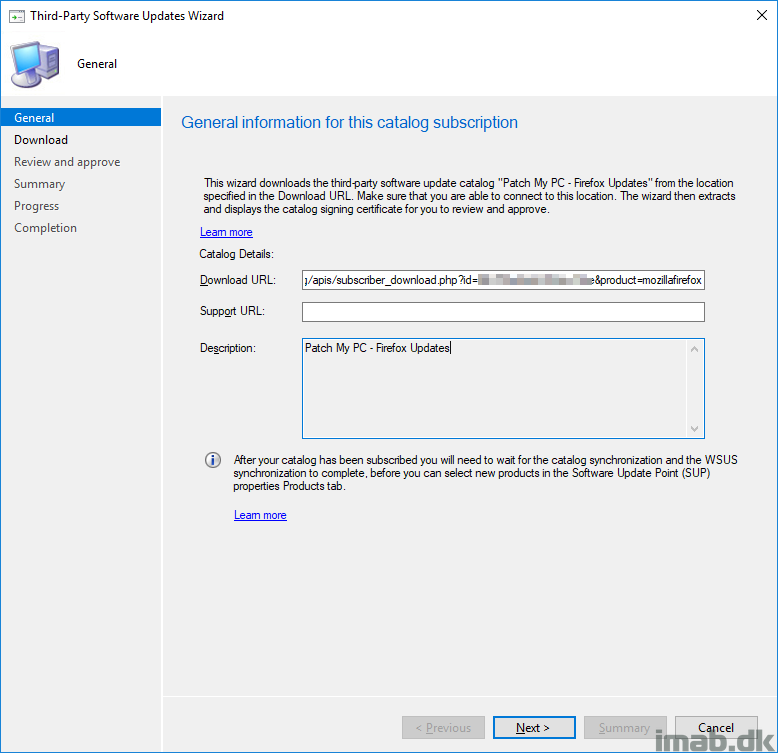
- In this example, I’m choosing to only add the Mozilla Firefox catalog. This is done by using the personal catalog URL provided by Patch My PC appended by the desired product. In this case &product=mozillafirefox. This is especially useful if you do not want to add the entire Patch My PC catalog into SCCM.
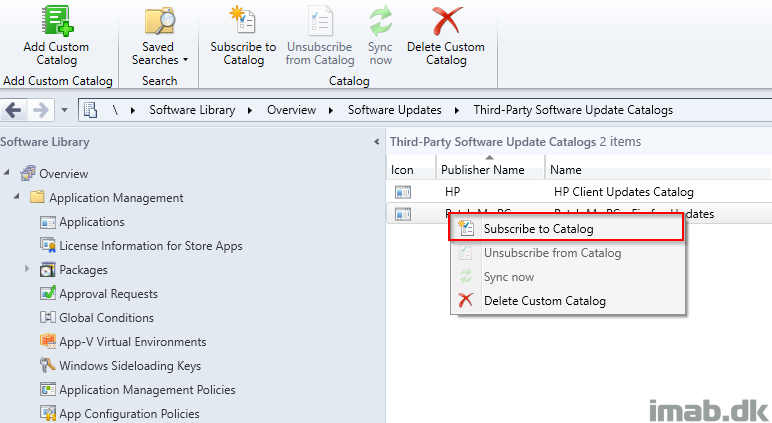
- Once the custom catalog has been added, you should go ahead and Subscribe to the Catalog. This is done through the ribbon menu or by right clicking the newly added catalog as shown below:
- Click Next on the general page of the wizard as shown below:
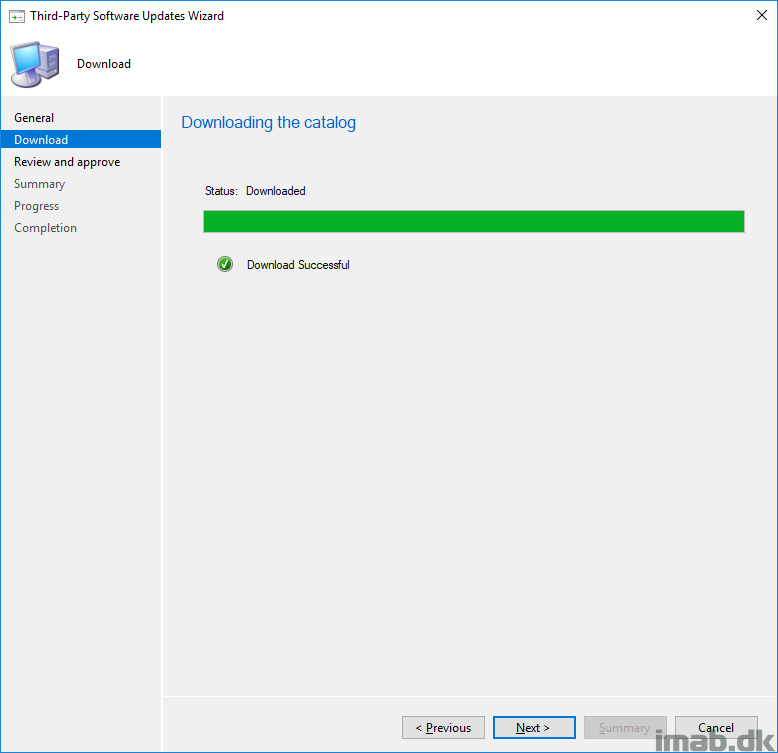
- Click Next once the download is successful – also as shown below.
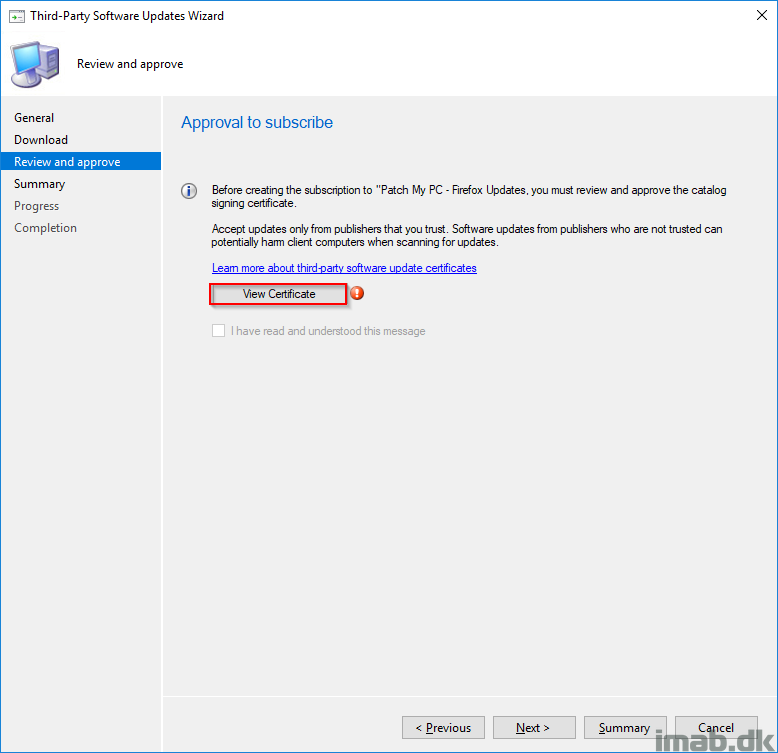
- Click View Certificate.
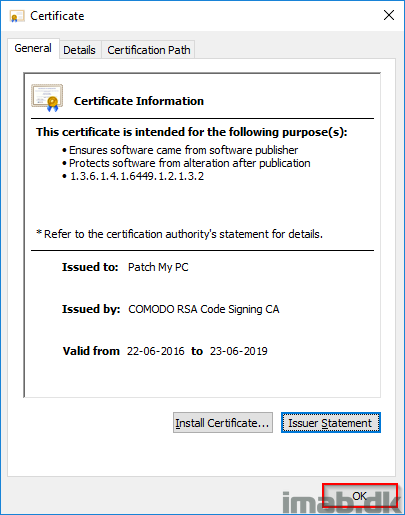
- The certificate will open – click OK to accept it.
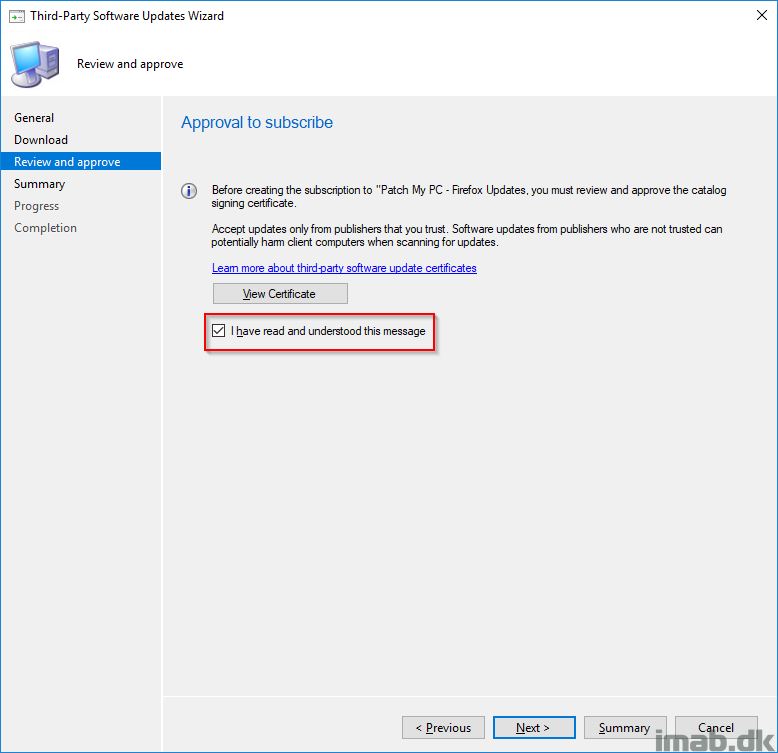
- Check I have read and understood this message and click Next.
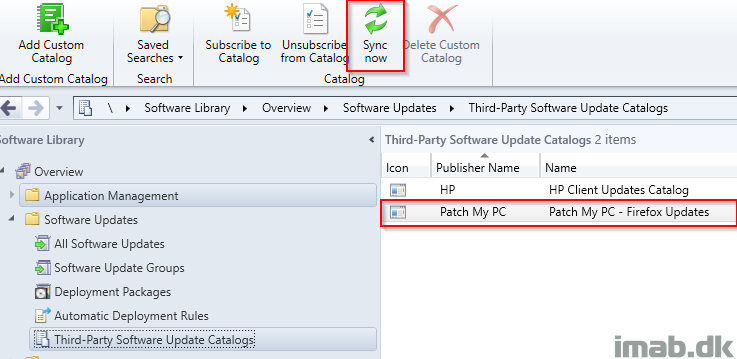
- Next, choose to sync the newly added catalog. This is done in the ribbon or by right clicking on the catalog.
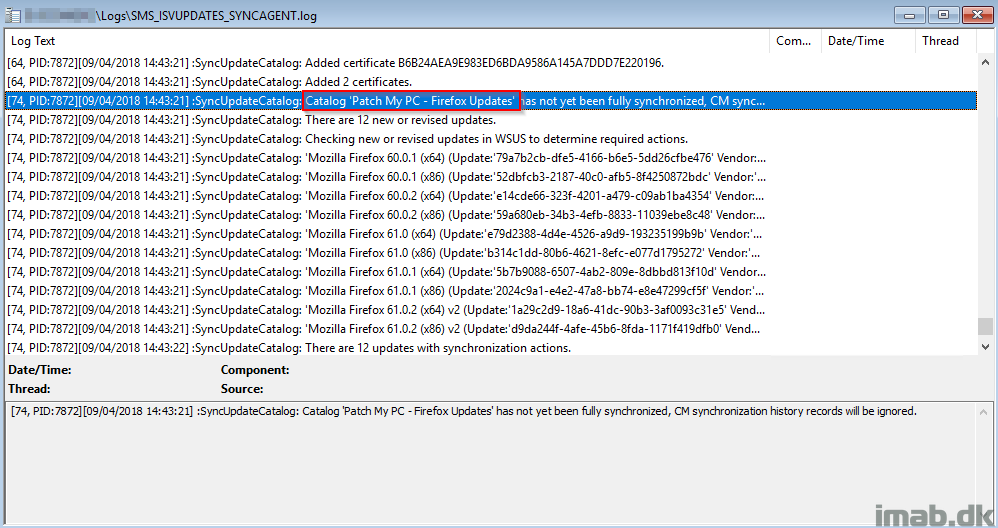
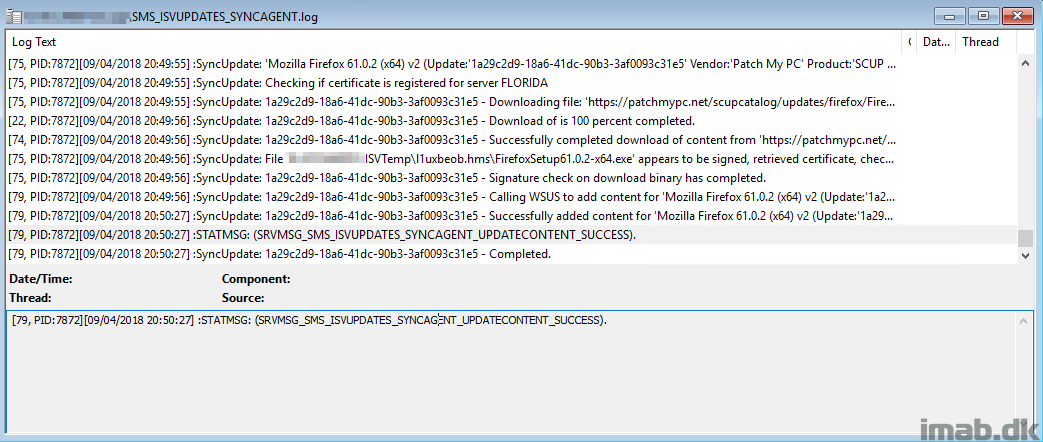
- Monitor following server side log file: <SCCM InstallDir>\Logs\SMS_ISVUPDATES_SYNCAGENT.log. Once the sync is in progress you will see similar entries as the ones illustrated below:
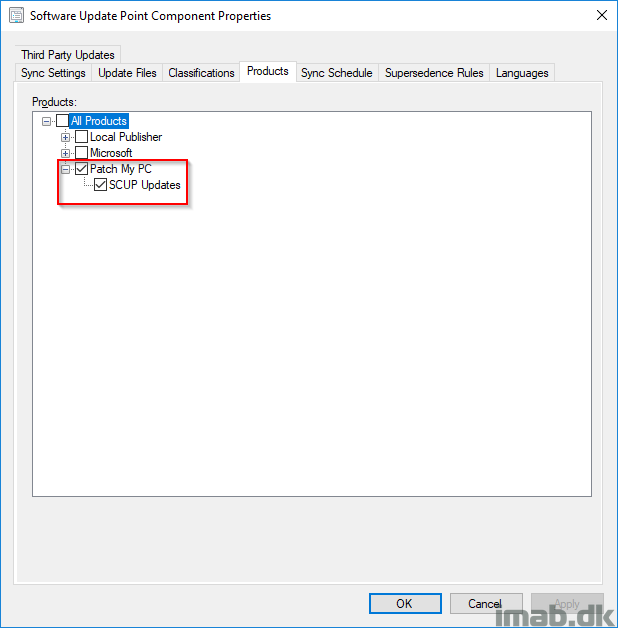
- Next, when the syncing in above is done, enable the new product on the properties of your Software Update Point in Configuration Manager.
- Do another synchronization of Software Updates and monitor <SCCM InstallDir>\Logs\wsyncmgr.log. The updates for Mozilla Firefox will show up in the All Software Updates nodes once done.
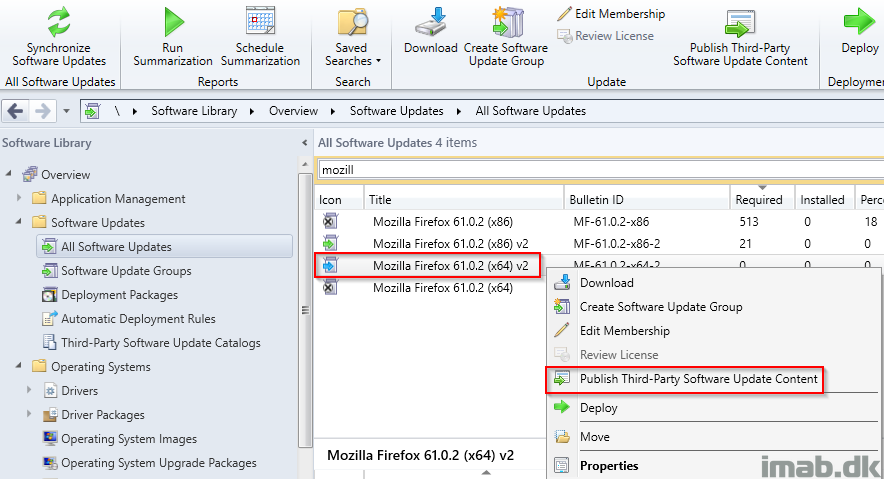
- The updates will initially be published with meta data only (blue icon). To download the content, right click the updates and select Publish Third-Party Software Updates Content.
- Downloading the content will result in some more action in the SMS_ISVUPDATES_SYNCAGENT.log and hopefully a success and completed status.
- And continuing from here will be the same as with any other Software Updates in terms of downloading, distributing, deploying with whatever requirements you have in that regard.
Option 2
The second option is to use Patch My PCs publishing service. This is downloaded and installed from the Patch My PC website at: https://patchmypc.net/publishing-service-setup-documentation where you also will find a great video guide on the installation it self.
The reason for this being mentioned as the second option, is that the actual setup in regards to certificates is removed once you have been through Option 1. Patch My PC will simply reuse the existing self signed certificate, and the great part is, that this has already been distributed to your clients automatically through the SCCM client.
- Below illustrates the Patch My PC publishing service, where the code-signing certificate is validated. In this case, this is the certificate automatically generated by SCCM during the setup in Option 1.

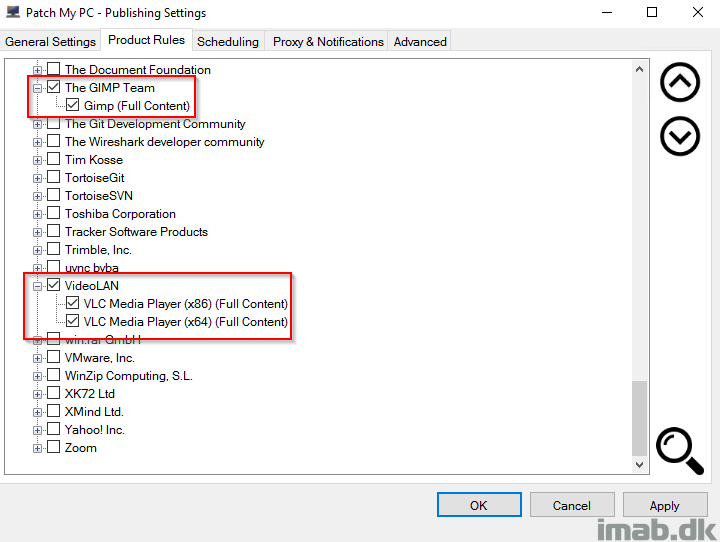
- From here it’s pretty much a walk in the park. You select your products on the Product Rules tab
- You can switch between metadata only and full content with right click depending on your goal
- Publishing with full content is a huge advantage vs. SCCM, where you will have to do that yourself
- Additional features on right click which again probably makes Patch My PCs publishing service the preferred choice
- Killing conflicting processes
- Adding pre/post scripts
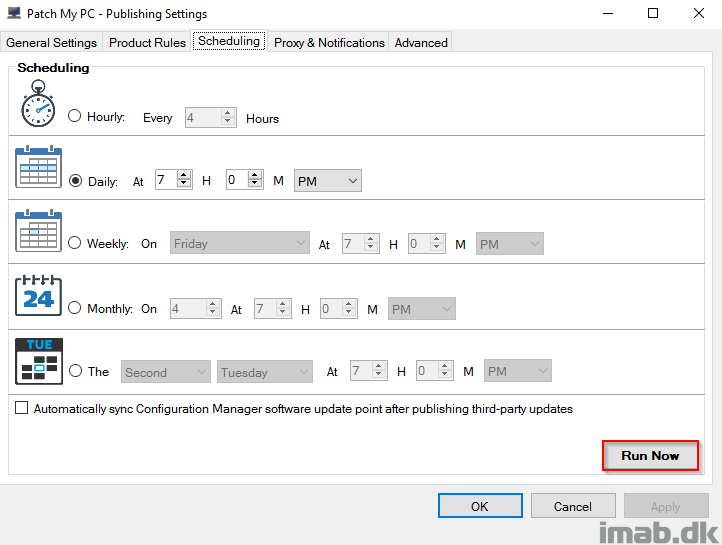
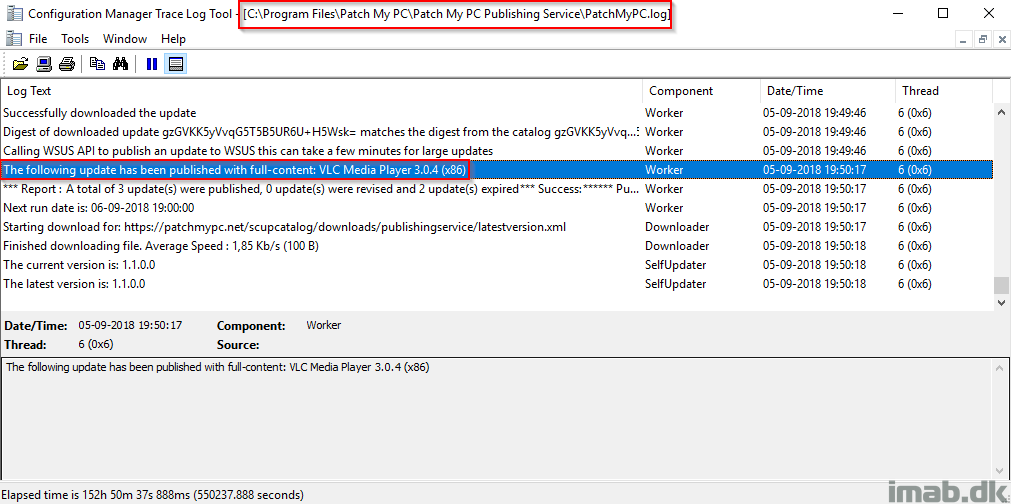
- To publish the updates immediately, click on Run Now on the Scheduling tab.
- Monitor the progress in the PatchMyPC.log:
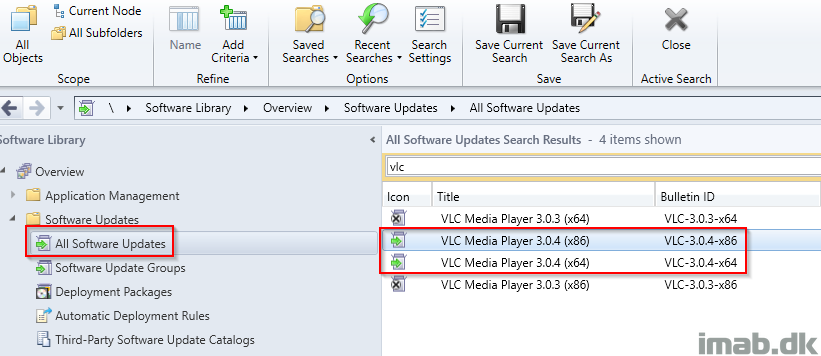
- Do another synchronization of Software Updates in SCCM and monitor <SCCM InstallDir>\Logs\wsyncmgr.log. Once done you will find your newly published updates in the All Software Updates nodes ready to be deployed like any other Software Update.
Enjoy 🙂