KB3025417 breaks SCEP reporting (and the solution)

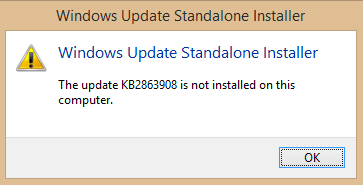
Beginning of June I had my ways with a problem in SCCM/SCEP and the update KB3025417.

I did what I usually do in those situations. I went to the forums, and created following thread: Here!

After fighting with MS 1st line support and not really getting anywhere, then sudden following blog pops up at the ConfigMgr team: Here!

They came up with an alternative solution, which is what I was looking for. However, running W81 x64 and looking to push the mentioned script using ConfigMgr, comes with following obstacles:

  • Packages in SCCM is being launched as a 32bit process. (This is what most people would use, considering that it’s a script and most would use .bat/cmd)
  • The provided script cannot run under a 32bit process. (I learned so the hard way. I confirmed that the script worked when run manually. I took it for granted that it worked as a SCCM package as well – it doesn’t)

So the solution to this is either of following:

  • Use the application model. (Not really prefered in this case, as it requires a detection method)
  • Trick the file x64 redirection to run cmd.exe from %SystemRoot%\Sysnative

An example of the last mentioned solution could be this batch script:

“C:\Windows\Sysnative\cmd.exe” /c “%~dp064bit.bat” (This coming from a x86 process, will run 64bit.bat in a x64 context instead)

64bit.bat will then contain the original script.

No task sequences available – error 80004005

So, I just had a computer denying to have any available task sequences, with the excuse of following error: Failed to get client identity (80004005)

A quick peak into smsts.log was showing below error as well:

NoTaskSequence 

Turns out the date and time in BIOS was off. I corrected the date and time, and all task sequences was available again.

Debug and view Windows .dmp files.

Quick and short post.

Nowadays if a BSOD happens in Windows, the OS automatically restarts the system. The users in an enterprise never notice that an BSOD just occured, but will find their computer automatically rebooting and as a result hereof, the users calls the helpdesk.

If a BSOD just happened, windows will log the errors in .dmp files. Typical location is %SystemRoot%\MEMORY.DMP

To view the .dmp files, you will need  the Windows Software Development Kit (SDK). This one is for Windows 8.1: https://msdn.microsoft.com/da-DK/windows/desktop/bg162891

Following the SDK, comes windbg.exe. This is the tool that allows you to view the content of the .dmp files.

Before opening any .dmp files, you will need to specify a symbol search path. You do so by launching WinDbg and click File -> Symbol File Path.

Insert following path: SRV*C:\Symbols*http://msdl.microsoft.com/download/symbols

(Replace the text in bold with your preffered location for the symbols)

More on the symbols: http://support2.microsoft.com/kb/311503


Software Updates and KB3000850 (failed installing updates with error 0x8024000b)

Microsoft just released a major update for Windows 8.1 and Server 2012 R2. A so called Update Rollup for November 2014: https://support.microsoft.com/kb/3000850

KB3000850 is treated as any other updates, and is being downloaded and deployed with my Configuration Manager 2012 environment.

Doing so out of the box was however not without obstacles. The updates is classified as a regular update, and therefore has a max. runtime set to 10 minutes.

Deploying the update as it is, was resulting in a failed status, and this in the WindowsUpdate.log:

WARNING: WU client failed installing updates with error 0x8024000b

This translates into maximum runtime exceeded, so you will have to go ahead and change that.

MaxRuntime

The update has a size of a service pack, so I allowed 60 minutes just be sure.


Troubleshooting boundaries and content download

I’m currently investigating some potential boundary issues related to the use of AD sites. Therefore I was looking for some more details on how content download is behaving considering slow and fast links in the environment.

This is some of the tests I did and the results thereof:

Action: Deploying software-package as available to a client which is within a slow boundary.

Result: Policy is received and entry in Software Center visible. Launching the installation gives following entry in the execmgr.log:

Action: Change the deployment options to Download content from distribution point and run locally when the client is within a slow or unreliable boundary. Refresh machine policy, and run the installation from Software Center again.

Result: This time execmgr.log immediately respondend with a successful content request.

execmgr

And while digging further into LocationServices.log, do notice following entries:

Distribution Point=’http://DP1.MYDOMAIN.COM/SMS_DP_SMSPKG$/KR1002C4′, Locality=’REMOTE’, DPType=’SERVER’, Version=’7958′, Capabilities='<Capabilities SchemaVersion=”1.0″><Property Name=”SSLState” Value=”0″/></Capabilities>’, Signature=’http://DP1.MYDOMAIN.COM/SMS_DP_SMSSIG$/KR1002C4′, ForestTrust=’TRUE’,
Distribution Point=’http://DP2.MYDOMAIN.COM/SMS_DP_SMSPKG$/KR1002C4′, Locality=’REMOTE’, DPType=’SERVER’, Version=’7958′, Capabilities='<Capabilities SchemaVersion=”1.0″><Property Name=”SSLState” Value=”0″/></Capabilities>’, Signature=’http://DP2.MYDOMAIN.COM/SMS_DP_SMSSIG$/KR1002C4′, ForestTrust=’TRUE’,

Locality=’REMOTE’, which identifies the client as being in a slow and unreliable boundary, which in this case is very true, but the software deployment is still running because of the change of options on the deployment.

When a client is within a fast and reliable boundary of the site, the entry would look like this, as in the locality of the client is local.

Distribution Point=’http://DP1.MYDOMAIN.COM/SMS_DP_SMSPKG$/KR1002C4′, Locality=’LOCAL’, DPType=’SERVER’, Version=’7958′, Capabilities='<Capabilities SchemaVersion=”1.0″><Property Name=”SSLState” Value=”0″/></Capabilities>’, Signature=’http://DP1.MYDOMAIN.COM/SMS_DP_SMSSIG$/KR1002C4′, ForestTrust=’TRUE’,

Client logs to consider when troubleshooting boundaries and content download:

execmgr.log
ClientLocation.log
LocationServices.log

Default Search Provider – Internet Explorer

Making Google the default search provider in Internet Explorer during OSD, is no trivial task. For many years, I have done so using an answer file to the Apply Operating System step in the task sequences.

And so, it was no different when I recently rebuilt our Windows 8.1 image:

GoogleXML

Above config of the answer file would previously remove the bing search engine, and replace it with google. Notice the ScopeDefault being set to true.

Something has changed though, and Bing now remains as default in Internet Explorer, but Google is however added. Strange.

I’m currently still looking into why the behaviour has changed, but until then I decided to go with a workaround. Forcing the search provider to be set to Google using a custom group policy.

Configure following GPO: User Configuration -> Administrative Templates -> Windows Components -> Internet Explorer : Restrict search providers to a specific list.

With this in place, the only search providers available to Internet Explorer, will be those which is found in HKCU\Software\policies\Microsoft\Internet Explorer\SearchScope. However, you’re not allowed to edit the content of this part of the registry manually (or with commands). You will need a custom made group policy, and luckily you can find one here: download (I found this somewhere else, and edited if for my use. It had other search engines, as well as an outdated string for google)

Import it as always, and the result will be this:

DefaultGoogle

As the help text suggests, this will put the required registry entries in place, and with only Google selected, Google will be the only and therefore default. (As 99.9% of users would prefer. Except Microsoft employees)

Restore Windows 8 built-in Apps

I just ran into an issue, where none of the built-in apps in Windows 8 was able to run. That including “Change PC Settings” accessed from the Charms Bar.

The event logs was showing following entry:

Event 5973, Apps

Activation of app.windows.immersivecontrolpanel_cw5n1h2txyewy!microsoft.windows.immersivecontrolpanel failed with an error: This app failedto launch because of an issue with it’s license. Please try again in a moment. See the Microsoft-Windows-TWinUI/Operation log for additional information.

All the apps are stored in the profile, and something eventually broke them: %userprofile%\AppData\Local\Packages.

To fix them again following powershell commands can be run. (a lot of post on the internet says, that the commands has to be run from an elevated prompt. I guess that only goes, if the user already is a local admin. All apps are user-based, and doesn’t require admin privileges)

So initiate a cmd.exe as the user who’s logged on, and run these:

powershell -ExecutionPolicy Unrestricted Add-AppxPackage -DisableDevelopmentMode -Register $Env:SystemRoot\WinStore\AppxManifest.xml
powershell -ExecutionPolicy Unrestricted Add-AppxPackage -DisableDevelopmentMode -Register $Env:SystemRoot\ImmersiveControlPanel\AppxManifest.xml
powershell -ExecutionPolicy Unrestricted Add-AppxPackage -DisableDevelopmentMode -Register $Env:SystemRoot\FileManager\AppxManifest.xml
powershell -ExecutionPolicy Unrestricted Add-AppxPackage -DisableDevelopmentMode -Register $Env:SystemRoot\Camera\AppxManifest.xml


Unlocking ConfigMgr 2012 objects

Hurray for powershell!

The ConfigMgr console crashes, and the objects you were working on are locked. For the next 30 minutes.

Since ConfigMgr 2012 SP1 we have following cmdlet to our rescue:

Unlock-CMObject -InputObject $(Get-CMTaskSequence -Name “Install Application – DocsCorp Apps”)

In this scenario I was working on a task sequence called Install Application – DocsCorp Apps, when my console crashed.

Connect to Windows Powershell through the ConfigMgr console to load the proper module, and use the above cmd to unlock the object.

Following cmds are available:

Get-CMApplication
Get-CMPackage
Get-CMDriverPackage
Get-CMOperatingSystemImage
Get-CMBootImage
Get-CMTaskSequence

Removing Office Updates (KB2863908) with msiexec.exe

Ouch, ever been in need of removing an Windows update? Usually this is often done when a particular update is interfering with an internal application, and normally this can be achieved with the wusa.exe tool:

WUSA.exe /uninstall /kb:2863908

But this has proven only to be working if the KB is related to Windows, else you will be getting this error: The update is not installed on this computer.

wusa

The correct answer to get rid of the update (besides uninstalling it manually) lies within the registry. Searching for the KB in question will give you a key named UninstallString with a value equal to this:

“C:\Program Files (x86)\Common Files\Microsoft Shared\OFFICE15\Oarpmany.exe” /removereleaseinpatch “{90150000-0011-0000-0000-0000000FF1CE}” “{6764E50D-D076-41BC-B069-08DD488AE88B}” “1033” “0”

Running this command directly will also remove the mentioned update, but will require manual intervention (we don’t like to do stuff manually)

However, you can use these values with the Windows Installer: msiexec.exe:

msiexec.exe /package {90150000-012B-0409-0000-0000000FF1CE} MSIPATCHREMOVE={6764E50D-D076-41BC-B069-08DD488AE88B}

Enjoy 🙂

Managing workgroup/DMZ clients with ConfigMgr

For security reasons, we have decided to join specific computers, serving a specific role to a workgroup instead of our domain. While being in a workgroup in the DMZ, we still had the need to manage them using ConfigMgr.

I had no previous experience in managing DMZ workgroup computers, so I had to gather the required know-how.

This is what I did:

  • Listed the limitations regarding workgroup clients. (No Active Directory)
  • Created the proper boundaries for the workgroups clients. (If no boundaries are created, all clients will be considered as a slow client)
  • Made sure that port 80 (CM) and port 8530 (WSUS) are forwarded to through the firewalls to the new network.

As the workgroup clients are on their own network, and without DNS to give them information about which and where to locate a Management Point, we had to make following changes to the host files (C:\Windows\System32\drivers\etc) on the clients:

host1

lmhost1

With these changes in place, you can install the CM client with following commandline: “ccmsetup.exe” SMSSITECODE=SITECODE SMSMP=yoursccmserver.fqdn.com

If installing the client from an OSD task sequence, you cannot use the SMSSITECODE property (We have a seperate OSD TS for these clients joining a workgroup).

When the client is installed successfully, you will be able to see the client in the SCCM console. Note that the client is not automatically approved (This can be changed to automatically auto approve all sorts of clients, but is not recommended)

notapproved

After manually approving the client in the console, the client will start to download policies from the Management Point. (To speed up this process, you can restart the ccmexec service)

In the initial phase of getting this to work, it’s a really good idea to watch the proper log files, to see what actually happens, and in case of any errors, take the required actions.

These are some of the important client logs to consider:

LocationServices.log
ClientIDManagerStartup.log
Policyagent.log

Enjoy… 🙂