Introduction
Just like I did with SCCM 1802, where I went through the exact steps for upgrading Configuration Manager Current Branch to the latest and greatest version, I’m going to do something similar in this post with 1806.
Nothing really changed, but I know someone would fancy to have an A-Z guide to walk them through the process, and as of such, I here give you the exact steps I went through to upgrade my environment.
How to
There is a precise cook book (checklist) for how to upgrade your Configuration Manager Current Branch to latest version. Obviously, not everything listed in there is relevant to all environments, so therefore I’m only covering those parts relevant to me. If interested in the complete checklist, you can find that right here: https://docs.microsoft.com/en-us/sccm/core/servers/manage/checklist-for-installing-update-1806
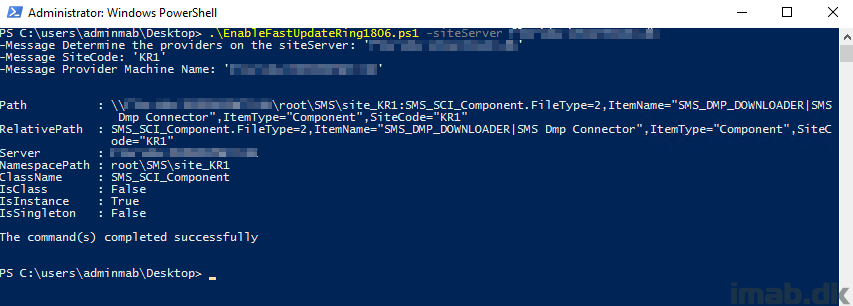
- 1806 is released to the “Early Update Ring”, which means not everyone has it listed (by the time of writing) as available in the SCCM console. You have to opt in to get it, and to do so you download following script: https://gallery.technet.microsoft.com/ConfigMgr-1806-Enable-3eb4b46c
- When downloaded and extracted (it comes as an .exe), fire up an elevated powershell and run it like shown below (EnableFastUpdateRing1806.ps1 <nameofyoursiteserver> (without the < >)
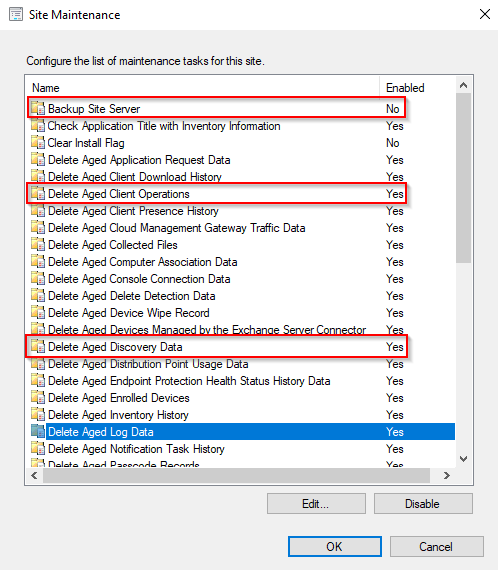
- Disable maintenance tasks. A good practice, also according to the checklist, is to disable following highlighted maintenance tasks. There is a chance that the upgrade might fail, if one of the mentioned tasks runs while the upgrade is running. (another approach is to run the upgrade, outside the schedule of those tasks)
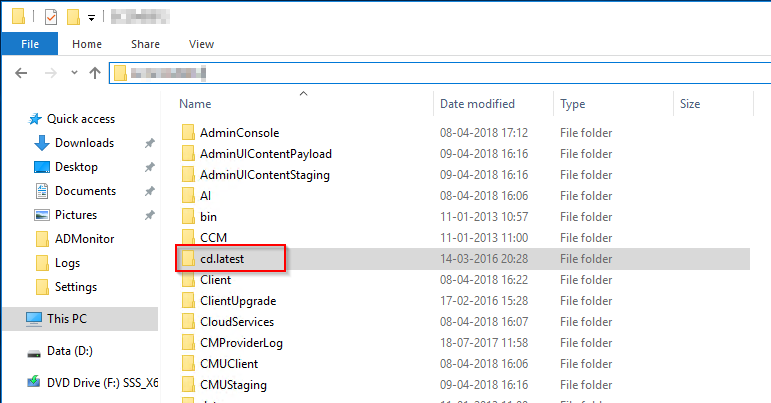
- Next, make sure you have backup! Backup of the SQL and backup of the CD.latest folder. As per above screenshot, I’m currently not using the built in backup task (I use something custom in SQL), but whatever backup method you use, make sure you have a relevant backup. That includes both SQL and the CD.latest folder. The CD.latest folder can be found in the installation directory of Configuration Manager:
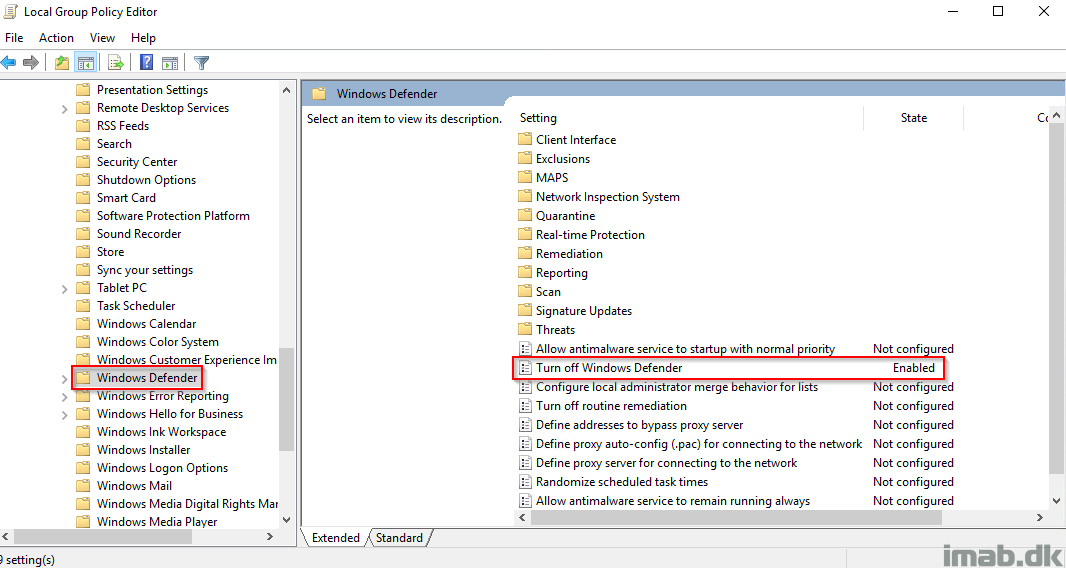
- Disable Antivirus. That’s right. The recommendation is to disable any running antivirus. My server is running Server 2016 and therefore comes with Windows Defender built in. To quickly disable Windows Defender, launch the Local Group Policy Editor from run: gpedit.msc and find Computer Configuration / Administrative Templates / Windows Components / Windows Defender and set Turn off Windows Defender to Enabled
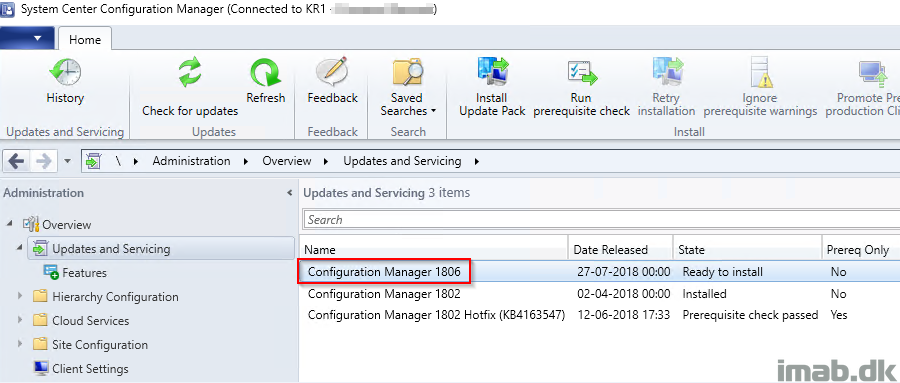
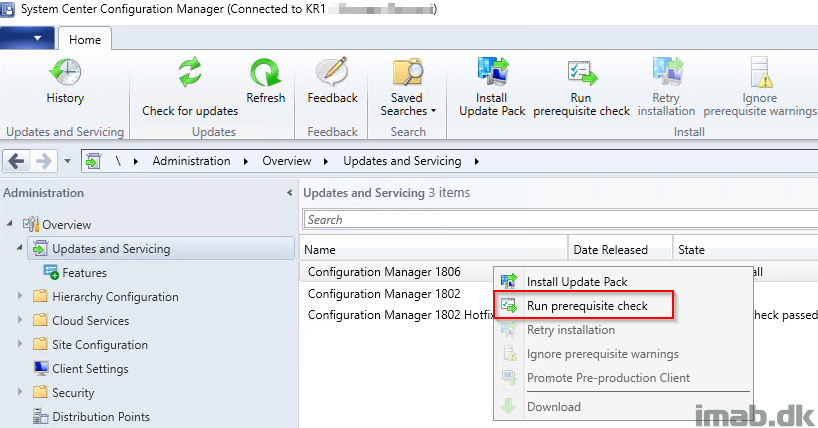
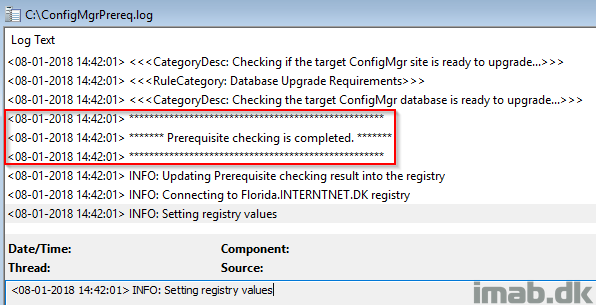
- Now find the available 1806 update in the ConfigMgr console. We opted in for the fast update ring previously using the PS script, which will gives us the 1806 update available to install. I started out running the prerequisite check. I do so to make sure that the connection/permissions to the SQL is OK prior to beginning the upgrade (we unfortunately still have the SCCM DB on a remote server. I will be moving it back locally soon enough). All prerequisite checks will be logged to C:\ConfigMgrPrereq.log. Look for Prerequisite checking is completed
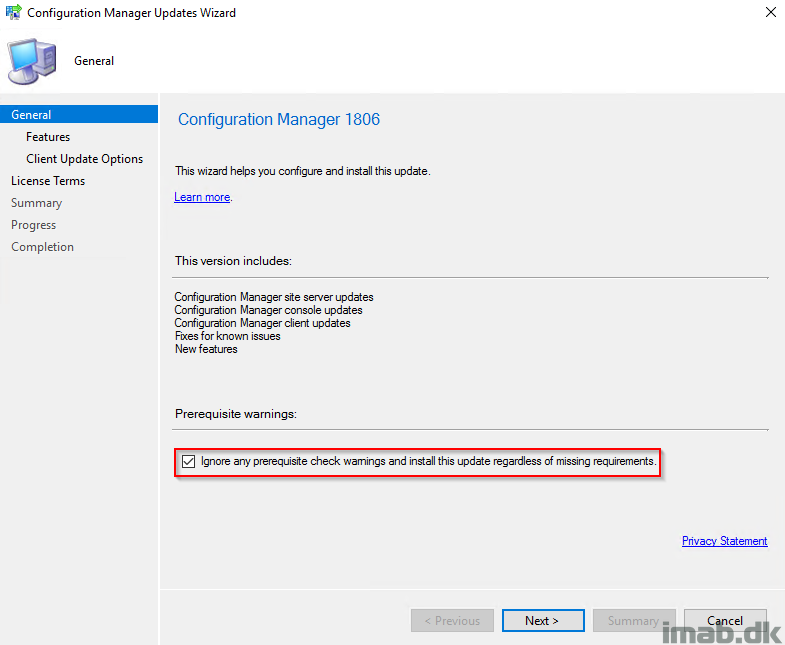
- Next, Install Update Pack and follow below screen shots
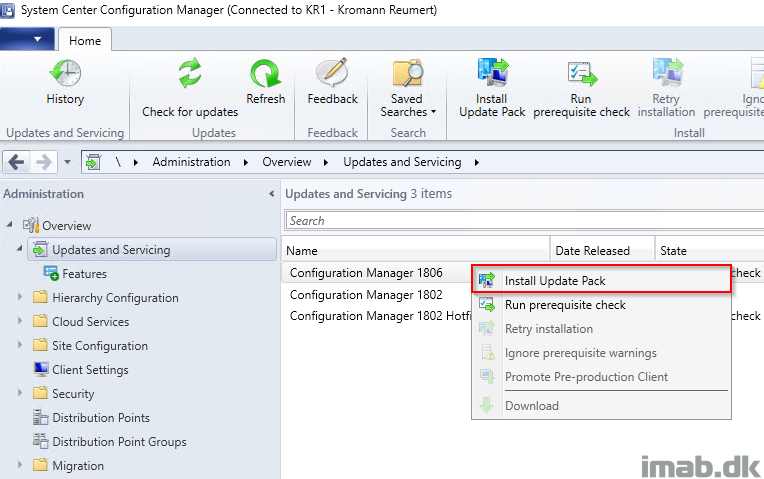
- Ignore the prerequisite check – we did that previously
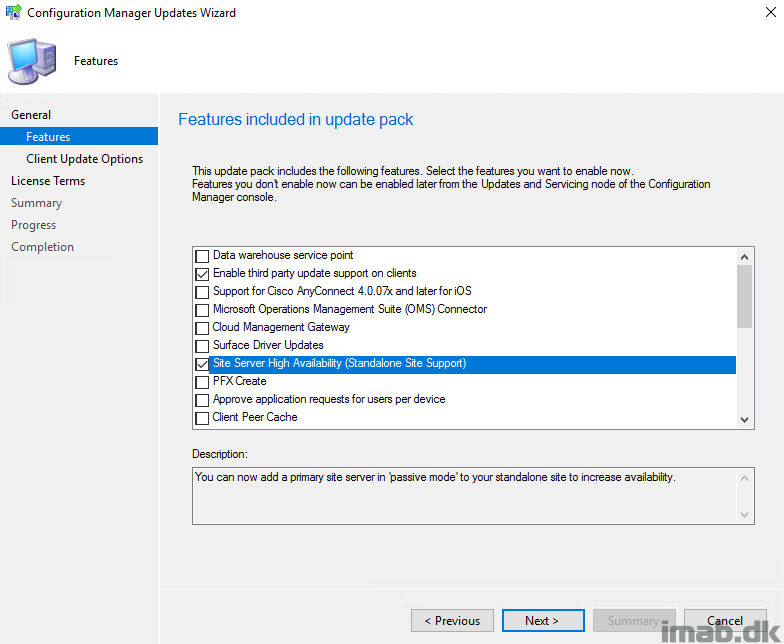
- Select and enable optional features. They can also be added later, post-upgrade
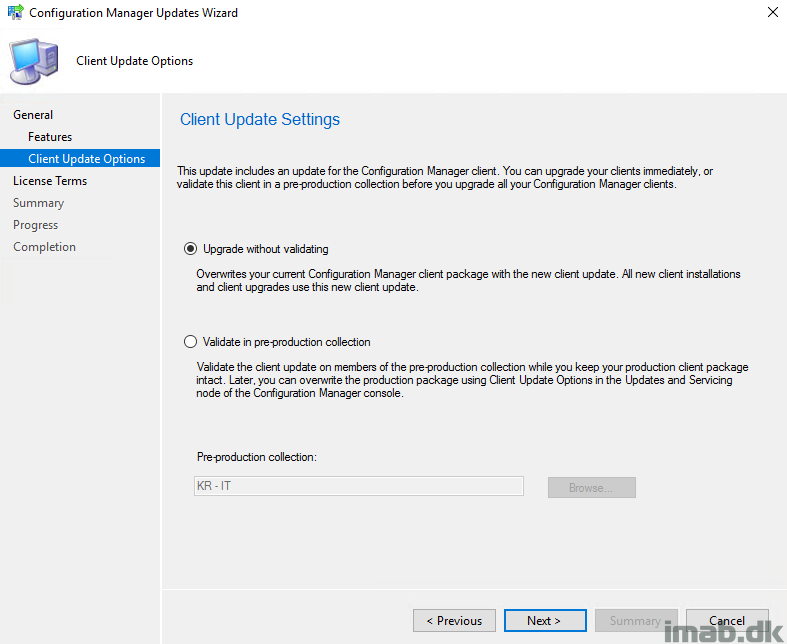
- Make a selection of whether you want to test the new ConfigMgr client or not. I went on without testing it (I have never ever seen any issues that made me wish that I tested the client first in pre-production
- Accept the license terms. Filling out the SA expiration date is optional. I didn’t fill it out. This is the final step before getting the mandatory summary

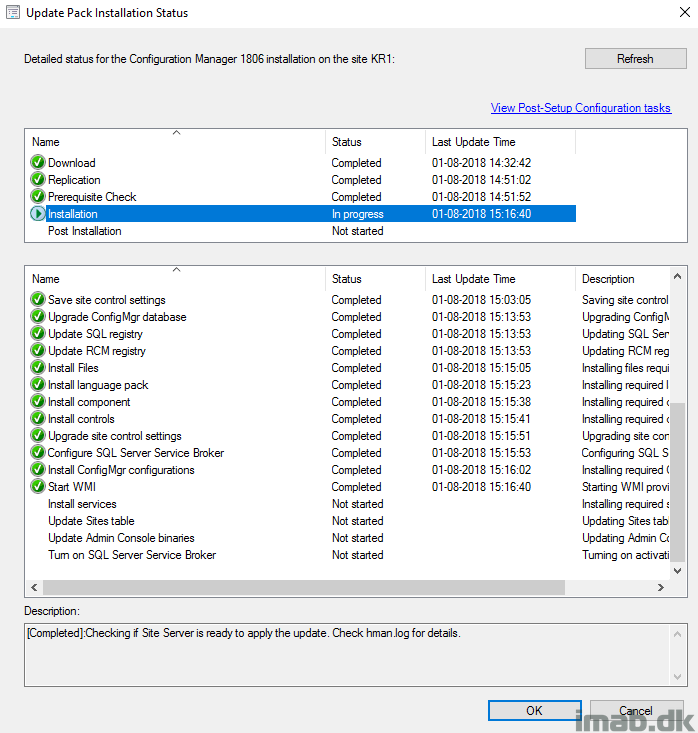
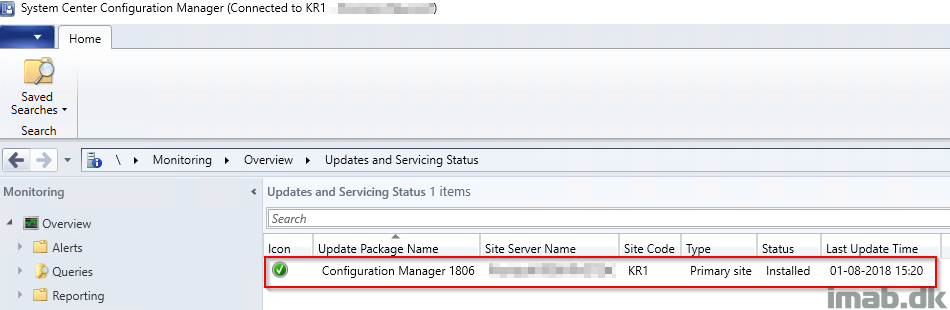
- By now the upgrade is installing. The progress can be followed in the Monitoring / Updates and Servicing Status node. Use refresh regularly as the status is not real time
Finally
Monitor SCCM-InstallDir\Logs\CMUpdate.log and SCCM-InstallDir\Logs\hman.log if curious to see what happens real time. When everything is done, CMupdate.log will be quiet with no more pending update packages to process:

And the monitoring node when refreshed looks like this:
Post Upgrade Steps
- Review site status and component status
- Enable the maintenance tasks that previously was disabled
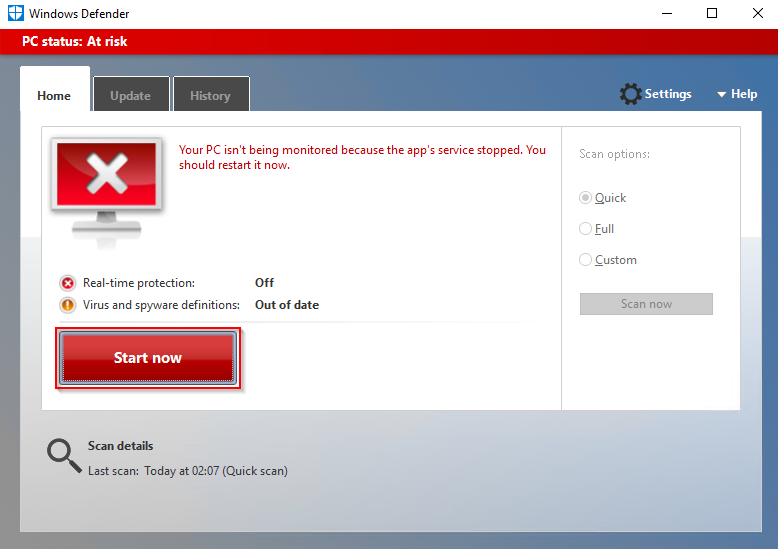
- Enable Windows Defender that previously was disabled through the Local Group Policy Editor. When you do so, make sure to start the Defender service again. Start now
References:
https://docs.microsoft.com/en-us/sccm/core/servers/manage/checklist-for-installing-update-1806
https://docs.microsoft.com/en-us/sccm/core/plan-design/changes/whats-new-in-version-1806
Thanks for the walkthrough. I’m curious about your note;
(we unfortunately still have the SCCM DB on a remote server. I will be moving it back locally soon enough)
Is that a recommended thing now?
Hi Ben, the recommendation today will always be to have the SQL locally. It will simplify many things and the license comes free with SCCM (SQL standard) 🙂