Introduction
First things first: This is not a typical topic on this blog, but I do find it highly relevant to share regardless.
The main story here is, that if you want to comply with GDPR and other regulations, you might end up in a situation where you need to require TLS for outgoing e-mails. This is something that’s easily achievable by configuring the proper transport rules in Exchange Online, but what if the recipient doesn’t support receiving e-mails encrypted with TLS in transit? In that situation, the e-mail typically bounce back after 24 hours of retrying (At the time of writing, this timer is not configurable in Exchange Online) .
24 hours is a long time to wait for the Non-Delivery Report, especially for my industry which is the legal vertical, so I had to come up with something else.
Powershell and Azure Automation to the rescue (and also a little something on how to protect the accounts used with Conditional Access).
OBS: Apologies if there are more clever solutions out there to cater for this. I haven’t been able to find any, but I’m sharing regardless, as the use of this easily can be transferred to other needs. 🙂
Powershell
I made it into GitHub, what a joy. The script is available here: https://github.com/imabdk/Powershell/blob/master/Get-EmailsNotSentUsingTLS.ps1
So the script does several things. I think it’s important to understand what exactly is being done, so I encourage anyone to study the content of the script thoroughly before putting to use.
I’m trying my best with the inline commenting in the script, but for good measures, this is what the script does in headlines:
- Reading credentials used with Azure Automation
- Note: These should be modified with your own details
- Connects to the Exchange Online Management module using the credentials above
- Note: This is available in the module gallery in Azure Automation
- Reads various variables for Office 365
- Note: These should be modified with your own details
- Gets all pending e-mails from the past 16 minutes
- Important: I run the script every 15 minutes and the execution time of the script is nothing more than 1 minute
- Loops through each pending e-mail to look for the specific reason
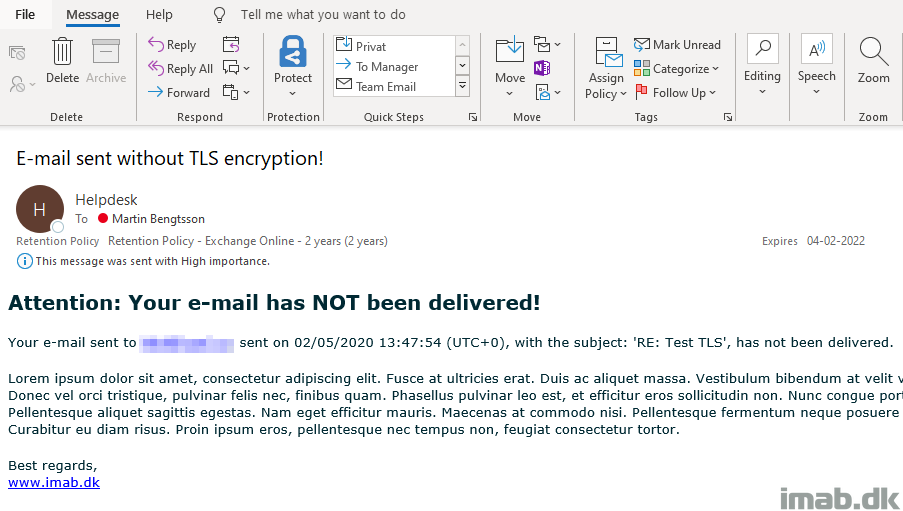
- If the reason for the e-mail being pending matches the reason for the lack of TLS support, the script moves on to send the sender a custom e-mail
- The content of this e-mail can be modified directly in the script by modifying the $bodyEmail variable
- If the reason for the e-mail being pending matches the reason for the lack of TLS support, the script moves on to send the sender a custom e-mail
Azure Automation
Automation Account
So how does one use this with Azure Automation?
First off, you will need an Automation Account. This is basically a few clicks away in the Azure portal and is explained very nicely right here: https://docs.microsoft.com/en-us/azure/automation/automation-quickstart-create-account.
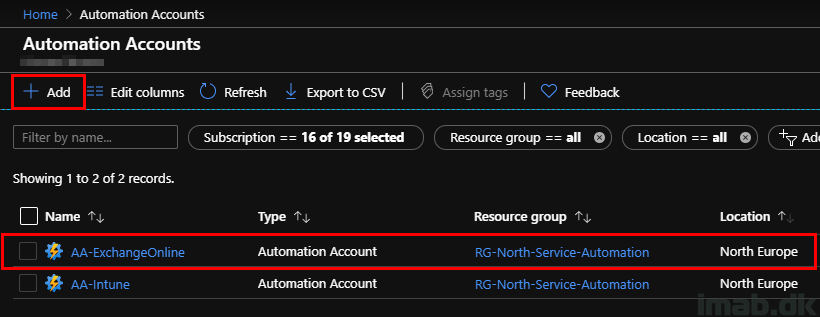
Below is taken directly from my environment, where I have an Automation Account for Intune and in this case, Exchange Online. I suggest you do something similar:
Credentials
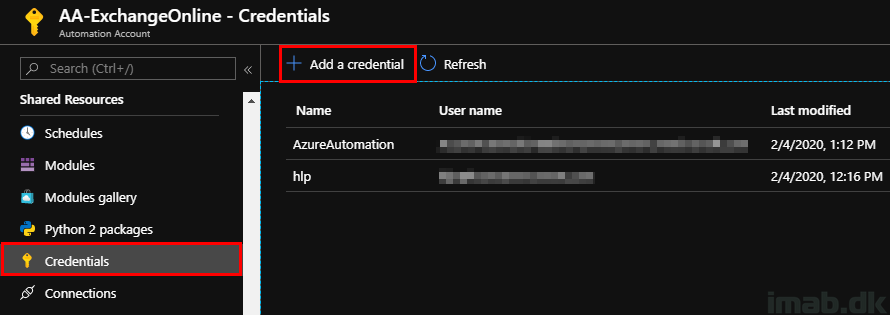
You will also need some credentials. In my scenario, I have 2 sets of credentials tied to this Automation Account.
- Azure Automation
- This is used to access Exchange Online and the account used here needs permissions in Exchange Online. The account in my instance is an Exchange Online Administrator.
- hlp
- This account is used to send the custom e-mail. This account is authenticating with Office 365 and Exchange Online, and will require a license for Exchange Online.
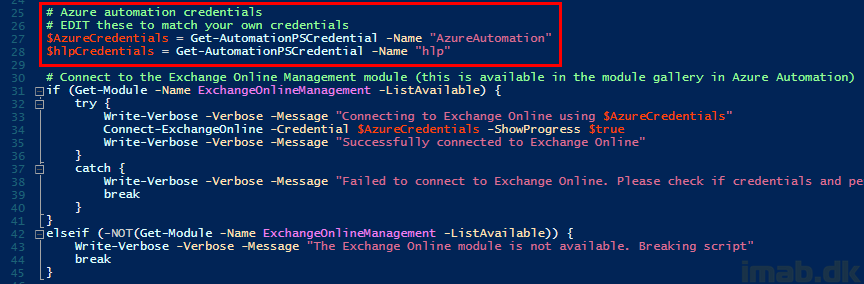
The same credentials are referenced in the beginning of the script:
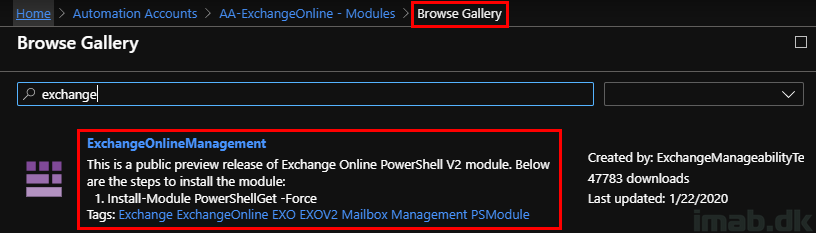
Module
The script relies on the ExchangeOnlineManagement module. You will need to import this into the Automation Account as well. This is done through the Gallery when searching for ‘Exchange’:
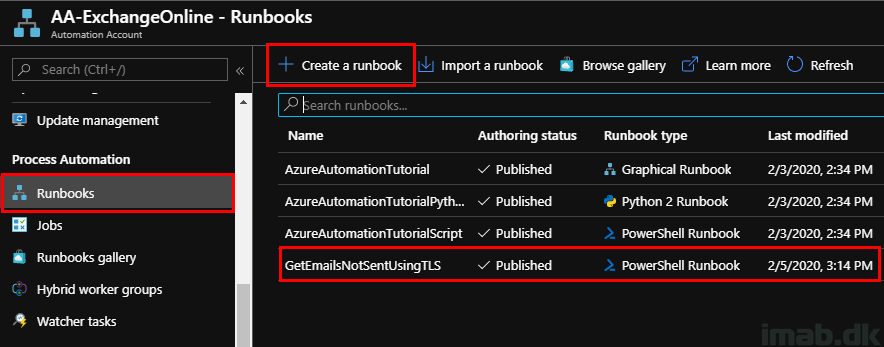
Runbook
Yet still on the Automation Account, you will need to create a new PowerShell Runbook. Below is an illustration of mine called GetEmailsNotSentUsingTLS.
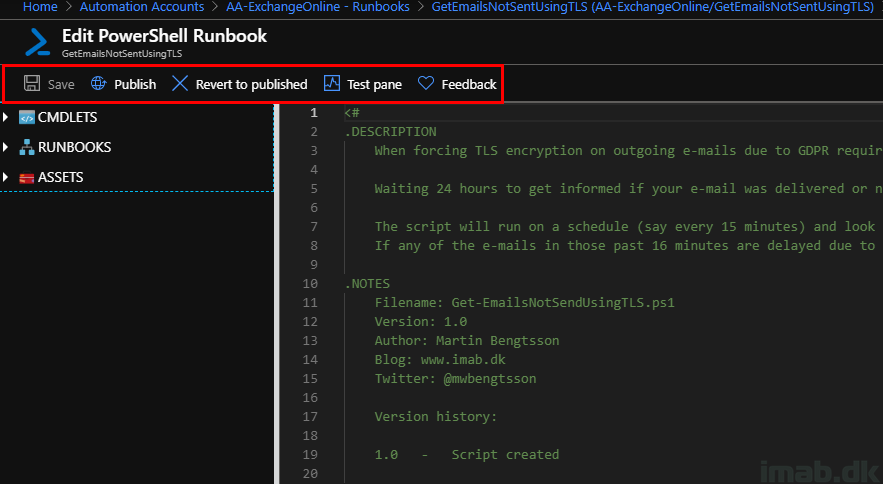
Editing the runbook gives you the option to paste in the entire script, but also to Save, Publish and TEST the content.
Schedule
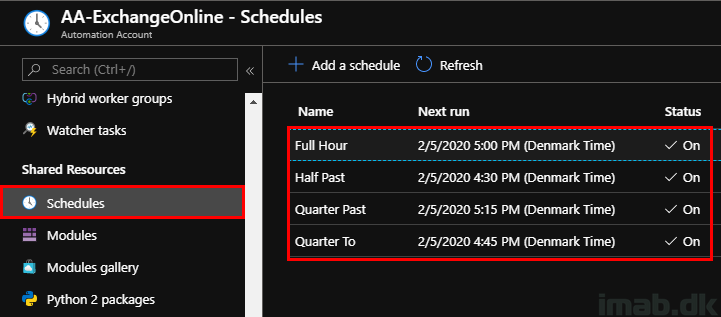
You can have the script to run on a schedule. This is quite relevant considering the need to run this automatically and every 15 minutes.
Schedules in Azure Automation has a minimum limitation to run each hour. If you want the script to run more often, you will need to create several schedules (4 to be exact, as I want this to run every 15 minutes).
Each of these schedules run every 1 hour, but has a different effective start time. Like so:
Testing
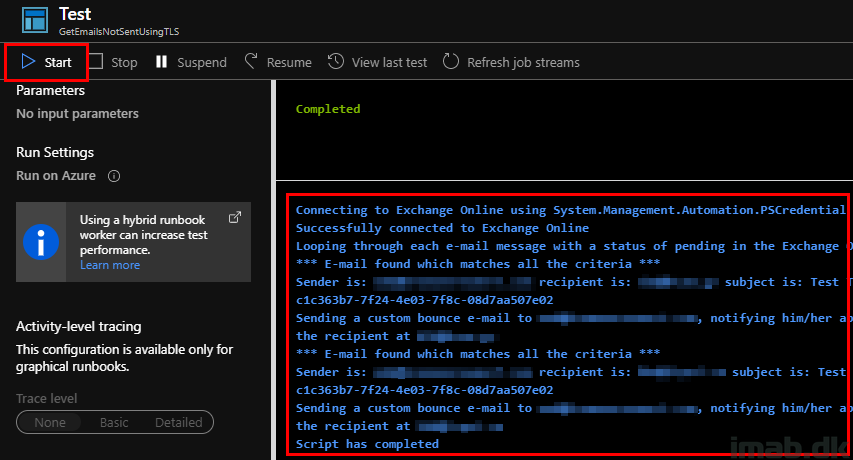
Testing the script is important! I suggest you test out the script and get familiar with the content before publishing it with the set schedules.
The script is logging some of the most important parts to the screen like shown below.
NOTE: I have obfuscated content for obvious reasons, as this is being run in my production environment, but I hope you get the picture.
Conditional Access
So, I have 2 accounts being used within this solution, and I want to protect both of them with Conditional Access. What to do?
My good buddy Michael Mardahl have a great suggestion in where the accounts can be used with MFA enabled. See this script: https://www.powershellgallery.com/packages/AzureAutomationAgainstExchangeOnlineWithMFAEnabledAccount/1.0.0
But what if you can’t recreate the accounts for whatever reasons, and have to use very specific and old accounts created long ago?
I intend to try and get Michael’s suggestion to work, but for now I have chosen to simply block the use of the accounts, if NOT coming from within the Microsoft Datacenter.
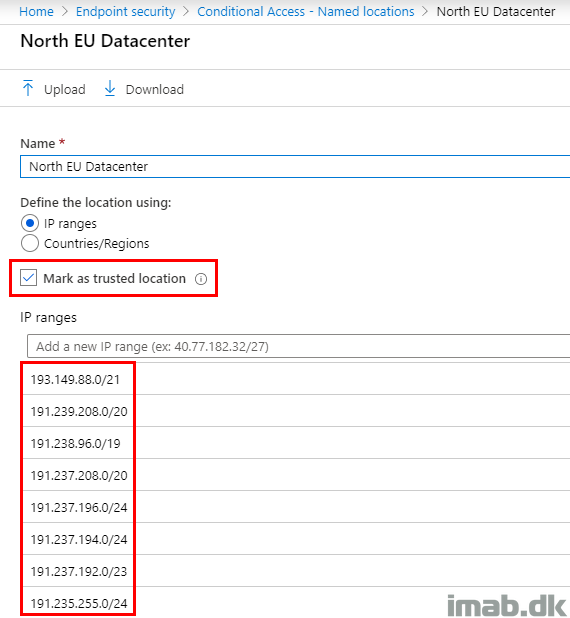
When you create the Automation Account, you select a location. This location’s IP adresses are publicly known and can be downloaded here: https://www.microsoft.com/en-us/download/details.aspx?id=41653
These IP adresses can be used in Conditional Access, to block anything but these IP adresses like so:
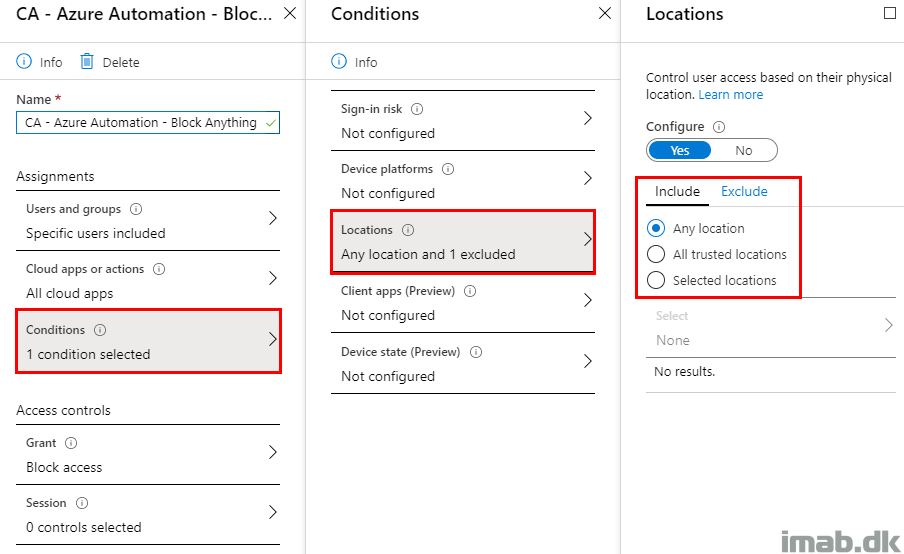
Making all the relevant datacenter’s IP’s a trusted location and excluding them in the CA policy above::
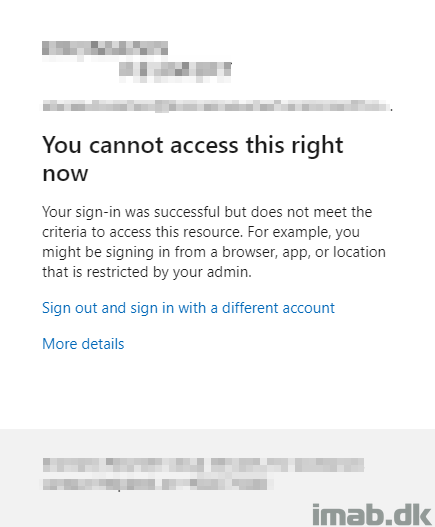
So if one successfully authenticate with the provided account outside of the Microsoft datacenter, one will be presented with being blocked by Conditional Access:
Note: Apologies for the obfuscation, but this is taken directly from the use in my production environment. 🙂
Enjoy 🙂
Awesome solution Martin. We are able to use this for a few cases. Thanks.
Leave the ip-adresses of the datacenter public – doesn’t that allow for someone to spoof the ip and the hack away at your accounts, effectively bypassing your CA-rule?
Thanks and good question. 🙂 I’m actually not sure if spoofing is sufficient in this case. The contacted server would not reply to you but to someone else, the address you spoofed(?).
Anyhow, that would also require that my credentials was leaked (obviously). While that of course is possible, it’s still very unlikely. Perhaps I should take a closer look on getting this to work with some sort of MFA. Thanks again 🙂
Looks like a great work around to a real problem. The MS timeout used to be 48 hrs, but 24 hrs is still too much for my business (legal as well). Thanks for sharing even though I think the work around is too complicated for me 🙂
Yeah, it was a necessity here. Can’t wait 24 hours. I’m happy to help with any concerns related to setting this up. Might look scary, but it shouldn’t bee too complicated 🙂
Great write up Martin and would like to thank for this great knowledge you are sharing for free 🙂
I want to catch the default NDR [Remote Server returned ‘550 5.1.10 RESOLVER.ADR.RecipientNotFound; Recipient not found by SMTP address lookup’ ] and customize it in sort to keep all the technical details and also include a nice humain friendly message.
Can you help me where in Exchange Online and which status I should look for ?
Many thanks for your help.
Thanks for the great script, Martin! We have been able to use it in helping us to implement Force TLS in our organization.
Tusind tak!
Matthew