Introduction
The ability to deploy .MSIX files has been available since System Center Configuration Manager 1806. Starting with 1810, we now also have the option to convert existing .MSI applications into .MSIX. Exciting! MSIX is told to be the future of software packaging, so getting a better understanding of how it works, and how it works with SCCM 1810 in particular, is not a bad idea.
So let’s walk through the entire process of converting an existing application, how to digitally sign the application and in the end, how to deploy the application. Curious? Read on 🙂
Configuration Manager
First things first. Converting of existing applications takes place in the Configuration Manager console.
- You will find the ability either in the ribbon menu. See below illustration:

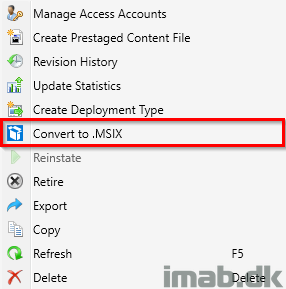
- Or by right clicking an application. See below illustration as well:
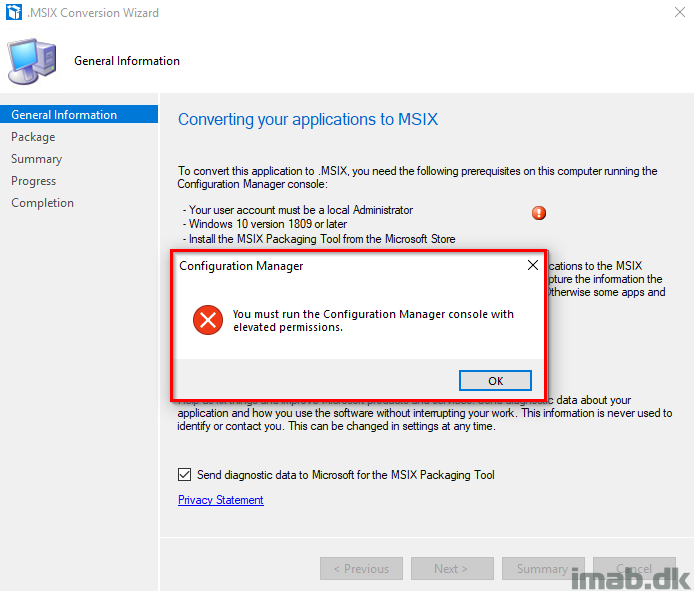
- In order for the conversion to work, you will need to comply with 3 prerequisites:
- The user account running the conversion must be a local administrator
- Using Windows 10 1809 or later
- Have the MSIX packaging tool from the Microsoft Store installed
- Running the conversion wizard will also remind you of those prerequisites and let you know if something is missing:
Code Signing Certificate
Note: The MSIX conversion process in Configuration Manager does not currently and by the time of writing digitally sign the application.
All MSIX packages must be digitally signed, no exception. Security breaches are taking down entire companies and Microsoft decided to help tackle these attacks by enforcing digital signing for all MSIX packages.
The digitally signing can be done with a code signing certificate from your internal CA, a public code signing certificate bought from a vendor like GoDaddy or DigiCert or even with a self-signed certificate.
In this example and for everyone’s convenience, I will use a self-signed certificate.
Create the Self-Signed Certificate
- Create a self-signed certificate using Powershell and the cmdlet New-SelfSignedCertificate. Copy / paste below and make changes if needed.
New-SelfSignedCertificate -DnsName imab.dk -CertStoreLocation cert:\LocalMachine\My -Type CodeSigningCert -KeyExportPolicy Exportable- Next up, we need to export the certificate into a .pfx file. This can also be done using Powershell and the cmdlet Export-PfxCertificate
- Make sure you take notice of the thumbprint and replace it with your own 🙂
$CertPassword = ConvertTo-SecureString -String “Password123” -Force –AsPlainText

Export-PfxCertificate -Cert cert:\LocalMachine\My\4F0FE526B73437B10734730A8851CC447AA96EE4 -FilePath C:\Temp\MSIX\imabdk.pfx -Password $CertPassword
Allow sideload of apps
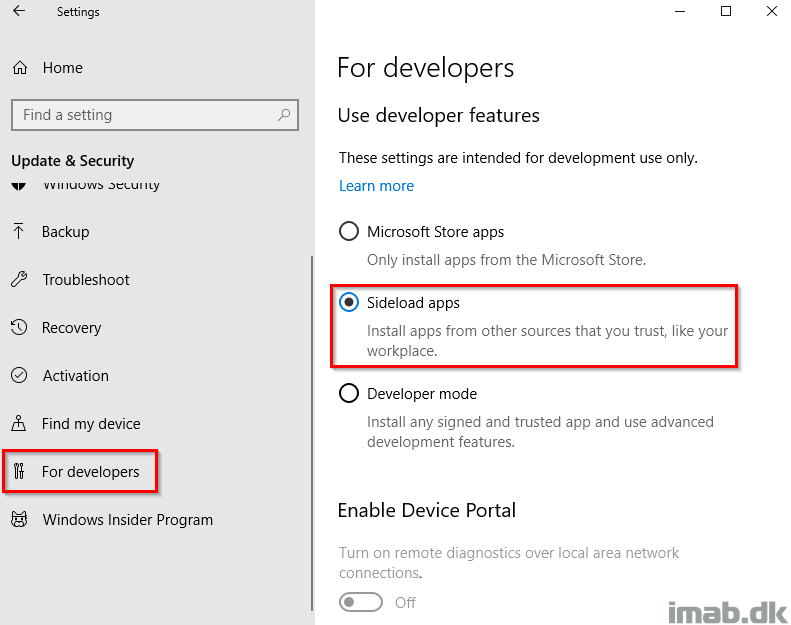
In order to be able to install apps outside of the Microsoft Store, you will need to enable and allow sideloading of apps. This can be done manually from the Settings menu or done at scale using group policy
Back in Configuration Manager
- Now, with the Code Signing certificate in place, we are ready to move on with the actual conversion. The first step in the wizard prompts you for a package location and the subject name of the signing certificate.
- Subject name of the signing certificate will be imab.dk, which we also specified when we created the certificate in the previous step
- Package save location: C:\Temp\MSIX
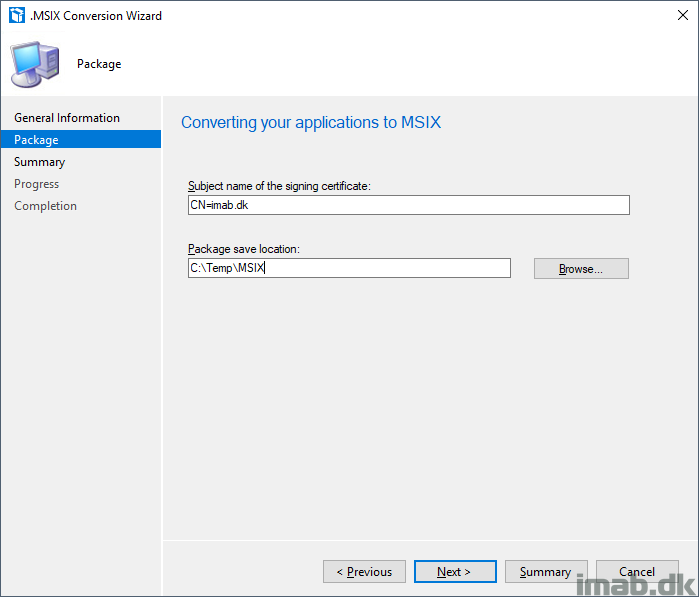
- Take notice of the summary and complete the wizard
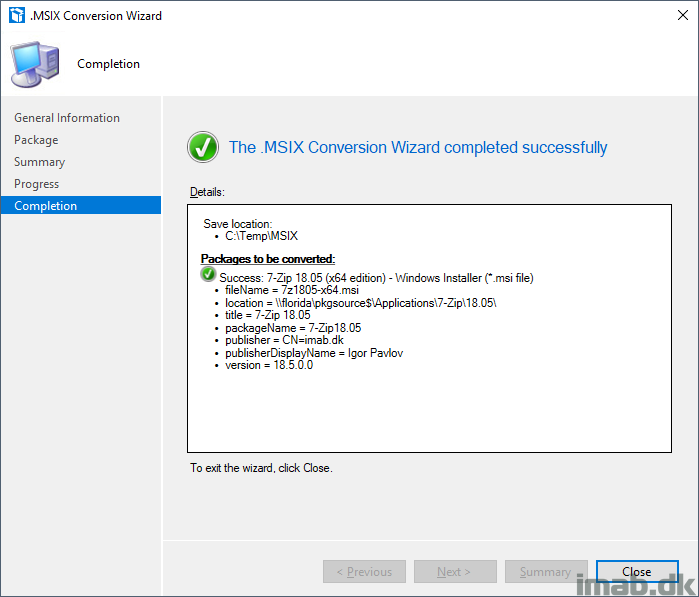
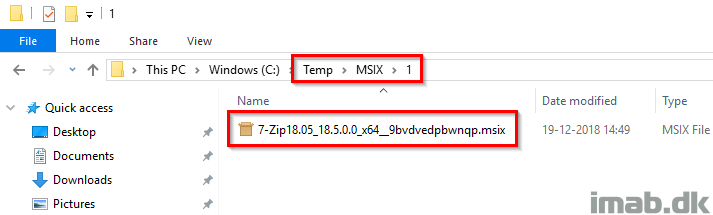
- This will leave you with a brand new .MSIX file in a sub folder to the specified location
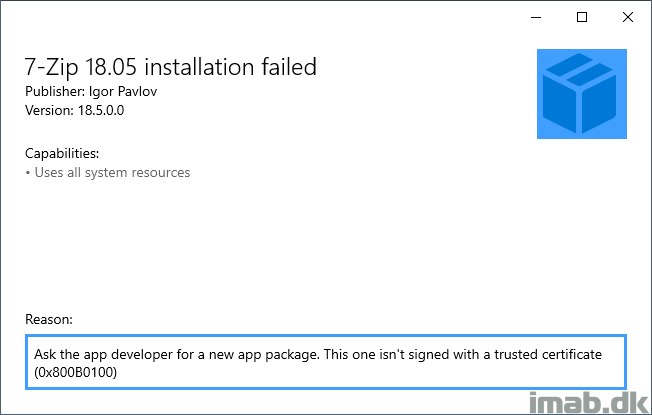
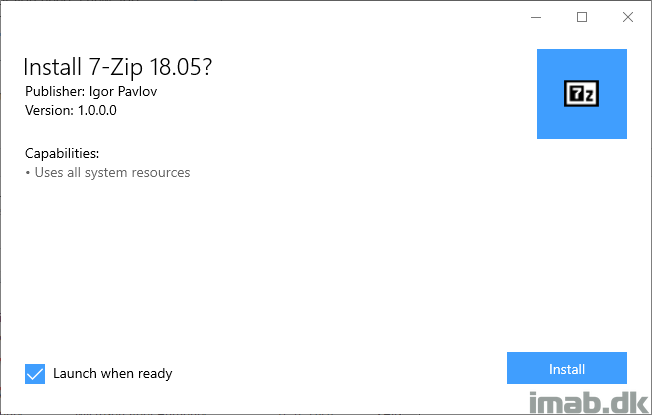
- If you initially try to run and install the newly converted .MSIX file, you will see that you are prevented from doing so because the file lacks the digitally signing
Sign the .MSIX file
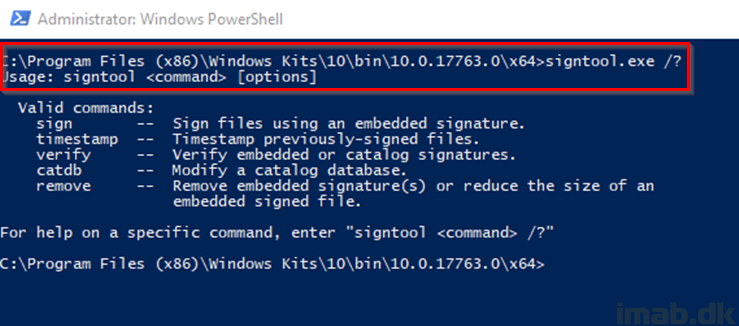
As I noted earlier, the digitally signing is a manual process for now and is required without exceptions. What we need in order to manually sign the application with our self-signed certificate, is to get a hold of the command-line tool SignTool.exe which is a part of the Windows 10 SDK
- Download the Windows 10 SDK from here: https://developer.microsoft.com/en-us/windows/downloads/windows-10-sdk
- All you need from the SDK installation will be: Windows SDK Signing Tools for Desktop Apps

- Once installed, you will find the signtool.exe on the following location:
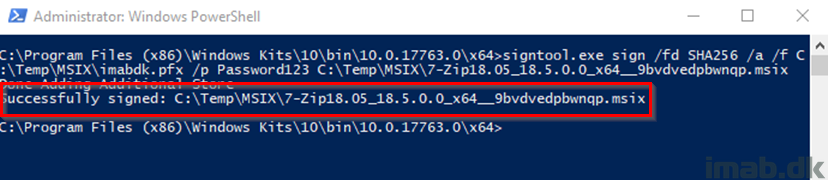
- What we are going to do here, is to use the exported self-signed certificate and sign the newly converted .MSIX application running below command. Both files are in my example located at C:\Temp\MSIX
signtool.exe sign /fd SHA256 /a /f C:\Temp\MSIX\imabdk.pfx /p Password123 C:\Temp\MSIX\7-Zip18.05_18.5.0.0_x64__9bvdvedpbwnqp.msix
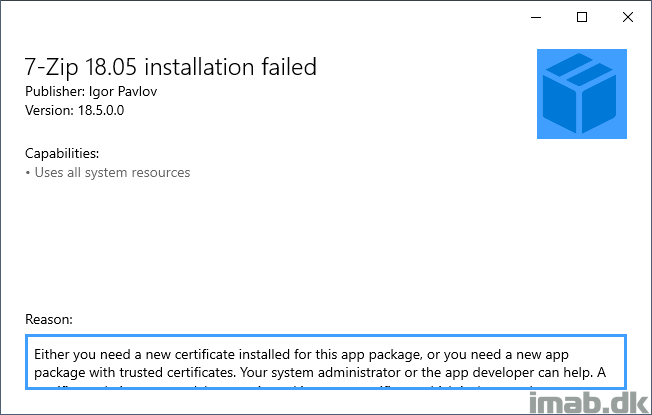
- Now, running the .MSIX package yet again now yields another certificate related error. This is due to us using a self-signing certificate which is not trusted by the computer.
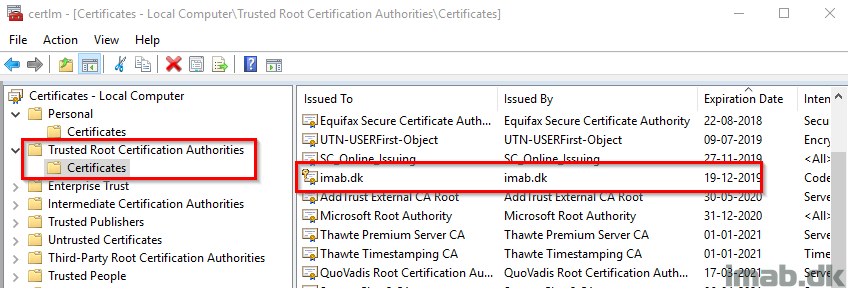
- This is easily fixed by importing the .pfx file into the Trusted Root Certification Authorities store on the local computer. This can also be done using Powershell and the Import-PfxCertificate cmdlet:
Import-PfxCertificate -FilePath C:\Temp\MSIX\imabdk.pfx -CertStoreLocation cert:\LocalMachine\Root -Password $CertPassword
- And finally. The application is now ready for installation and deployment
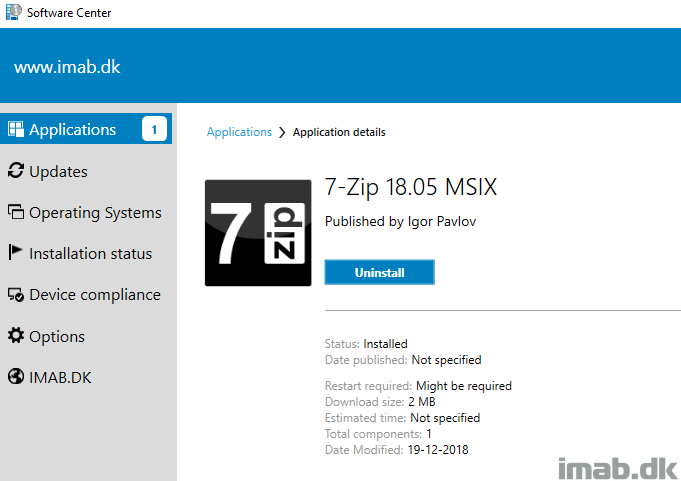
Deployment
The deployment of the .MSIX file is almost self explanatory, but for good measures and everything, I will give you a few illustrations of the process.
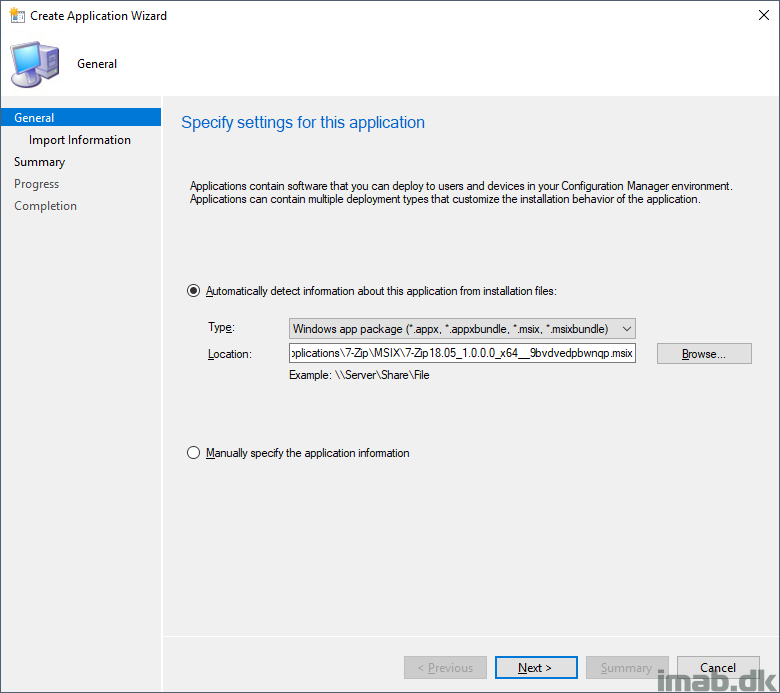
- Create a new application and point to your .msix file on your package share. Everything as usual.
- Distribute and deploy the application. Also everything as usual. In this example, the application is deployed as available to a collection consisting of users
Happy deployment 🙂
Hi
I tried creating msix package , but I am facing issue with signing the msix package.
Error :
SignTool Error: This file format cannot be signed because it is not recognized.
Can u help me out in this issue?
Thanks in advance