Introduction
Update July 26, 2018: I have made an update to below content. Please find the new post on the link below. Note that the content in this post is still relevant.
Windows 10 1803 is out (old news I know). Nevertheless, its always a good idea to be ahead and start thinking and planning the upgrade of your environment. Configuration Manager offers a lot of flexibility in terms of servicing plans and the use of task sequences.
Task sequences is the preferred method in our environment, and I thought I’d share how you can deploy the Windows 10 1803 upgrade through the Powershell App Deployment Toolkit, some custom Powershell script and an application in the Configuration Manager Software Center. Curious? Read on. 🙂
1. Powershell App Deployment Toolkit
I’m not going into super details about the Powershell App Deployment Toolkit (PSADT), but will instead just provide you with a copy of the complete toolkit including my modifications for download: PSADT_1803Upgrade.zip (8551 downloads )
There are a few changes to it worth mentioning, so here goes:
- The installation has to happen as the currently logged on user and run in such context, therefore does the PSADT not require administrative rights (changed in AppDeployToolkitConfig.xml)
- As of such, the registry path where the toolkit stores information changed to HKCU from HKLM (changed in AppDeployToolkitConfig.xml)
- No balloon notifications (changed in AppDeployToolkitConfig.xml)
- Slightly modified Show-InstallationPrompt to support cancellation of the deployment and line breaks of the message displayed
- PSADT is running my custom powershell script explained in the next section (not included in the download on purpose)
2. Custom Powershell Script
This is actually where the most of the magic happens. This is the script you have to put into the Files folder of the Powershell App Deployment Toolkit. I left it out on purpose, forcing whoever to use this approach, to take a closer look on what’s happening. I will explain along the lines what’s happening inside the script. Note that it’s still referring to my stuff (nothing secret). Change accordingly.
Copy/paste and save the script as Execute-OSUpgrade.ps1 and put into the Files folder.
In short the script does following:
- Loads the Write-Log function
- Loads the Software Center as the currently logged on user
- Retrieves the upgrade task sequence
- Executes the upgrade task sequence
- Writes to registry and logfile
# Log function - change path of logfile to suit your environment
function Write-Log {
    [CmdletBinding()]
    Param
    (
        [Parameter(Mandatory=$true,
                   ValueFromPipelineByPropertyName=$true)]
        [ValidateNotNullOrEmpty()]
        [Alias("LogContent")]
        [string]$Message,

        # EDIT with your location for the local log file
        [Parameter(Mandatory=$false)]
        [Alias('LogPath')]
        [string]$Path='C:\ProgramData\Kromann Reumert\Execute-OSUpgrade.log',

        [Parameter(Mandatory=$false)]
        [ValidateSet("Error","Warn","Info")]
        [string]$Level="Info",

        [Parameter(Mandatory=$false)]
        [switch]$NoClobber
    )

    Begin
    {
        # Set VerbosePreference to Continue so that verbose messages are displayed.
        $VerbosePreference = 'Continue'
    }
    Process
    {

        # If the file already exists and NoClobber was specified, do not write to the log.
        if ((Test-Path $Path) -AND $NoClobber) {
            Write-Error "Log file $Path already exists, and you specified NoClobber. Either delete the file or specify a different name."
            Return
            }

        # If attempting to write to a log file in a folder/path that doesn't exist create the file including the path.
        elseif (!(Test-Path $Path)) {
            Write-Verbose "Creating $Path."
            $NewLogFile = New-Item $Path -Force -ItemType File
            }

        else {
            # Nothing to see here yet.
            }

        # Format Date for our Log File
        $FormattedDate = Get-Date -Format "yyyy-MM-dd HH:mm:ss"

        # Write message to error, warning, or verbose pipeline and specify $LevelText
        switch ($Level) {
            'Error' {
                Write-Error $Message
                $LevelText = 'ERROR:'
                }
            'Warn' {
                Write-Warning $Message
                $LevelText = 'WARNING:'
                }
            'Info' {
                Write-Verbose $Message
                $LevelText = 'INFO:'
                }
            }

        # Write log entry to $Path
        "$FormattedDate $LevelText $Message" | Out-File -FilePath $Path -Append
    }
    End
    {
    }
}

# Name of the task sequence. Modify to suit your environment
$TaskSequenceName = "Upgrade OS - TEST"

## Get the Software Center
try {
    $softwareCenter = New-Object -ComObject "UIResource.UIResourceMgr"
    Write-Log -Message "Successfully connected to the Software Center"
}
catch {
    Write-Log -Message "Cannot connect to the Software Center."
    exit 1
}

$TSReferencePackageIDs = @()
# Get the Task Sequence object
$taskSequence = $softwareCenter.GetAvailableApplications() | Where-Object { $_.PackageName -eq "$TaskSequenceName" }

if ($taskSequence) {
    $taskSequenceProgramID = $taskSequence.ID
    $taskSequencePackageID = $taskSequence.PackageID

    foreach ($i in $taskSequence.GetMemberPrograms()) {
         $TSReferencePackageIDs += $i.PackageID
    }
}
else {
    Write-Log -Message "Failed to retrieve the Windows 10 upgrade from the Software Center."
    exit 1
}

# Execute the task sequence
$softwareCenter.ExecuteProgram($taskSequenceProgramID,$taskSequencePackageID,$true) | Out-Null

# Get current date
$Today = (Get-Date).ToString("dd/MM/yyyy")

# Write to registry if task sequence was successfully executed
if ($TaskSequence) {
    Write-Log -Level Info -Message "Task Sequence was successfully executed"
    $RegistryPath = "HKCU:\Software\Kromann Reumert"
        if (-not(Test-Path -Path $RegistryPath)) {
            New-Item -Path $RegistryPath –Force
            }
        New-ItemProperty -Path $RegistryPath -Name "1803UpgradeHasRun" -Value 1 -PropertyType "String" -Force
        New-ItemProperty -Path $RegistryPath -Name "1803RunDate" -Value $Today -PropertyType "String" -Force
    }

# Write to registry if task sequence failed to execute
else {
    Write-Log -Message "Task Sequence was not executed properly"
    $RegistryPath = "HKCU:\Software\Kromann Reumert"
    if (-not(Test-Path -Path $RegistryPath)) {
        New-Item -Path $RegistryPath –Force
        }
    New-ItemProperty -Path $RegistryPath -Name "1803UpgradeFailed" -Value 1 -PropertyType "String" -Force
    New-ItemProperty -Path $RegistryPath -Name "1803FailedDate" -Value $Today -PropertyType "String" -Force
    exit 1
}
3. Configuration Manager
Next up is the application in Configuration Manager. Create a new application following below screenshots and instructions. (This is based off my edition of the PSADT and above Powershell script)
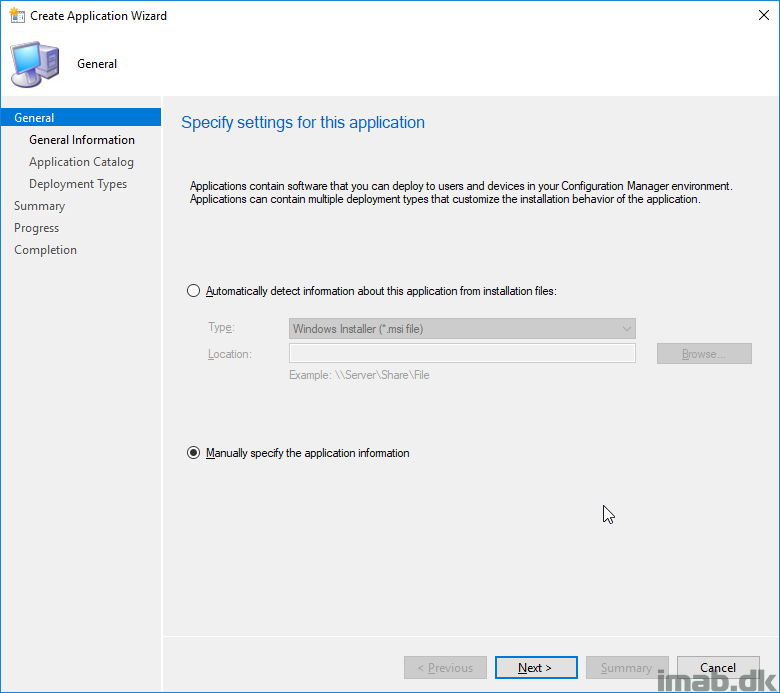
- Manually specify the application information and click Next
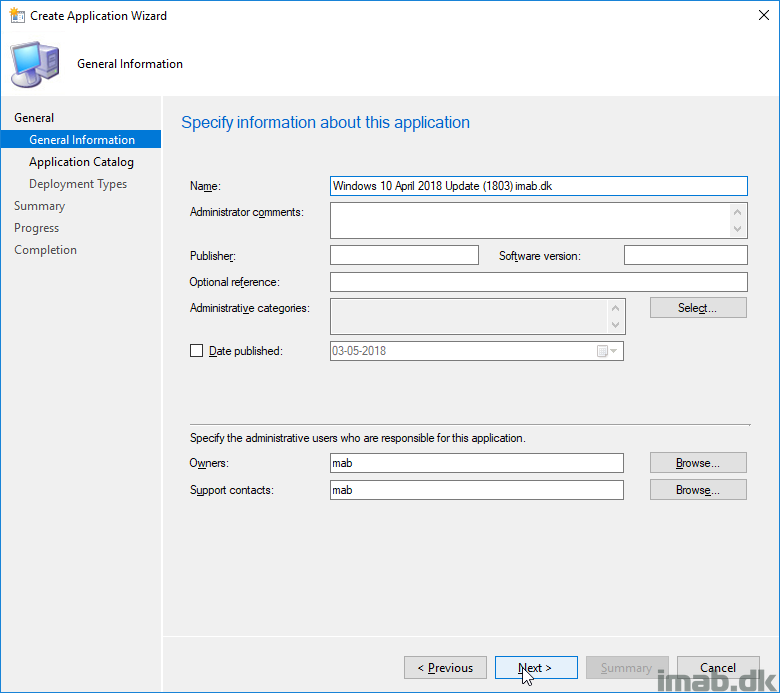
- Give the application a name and fill out as your desire and click Next
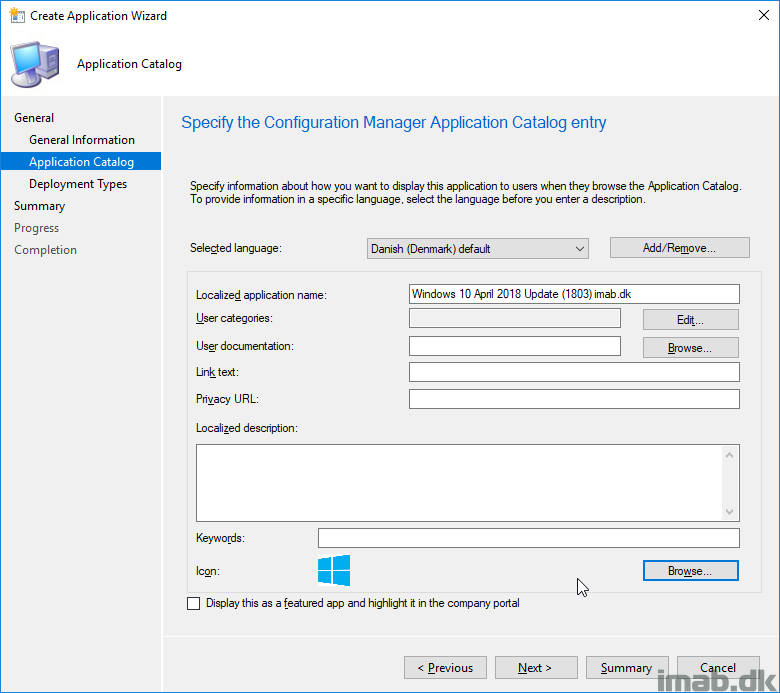
- Specify details for the Software Center and select an icon
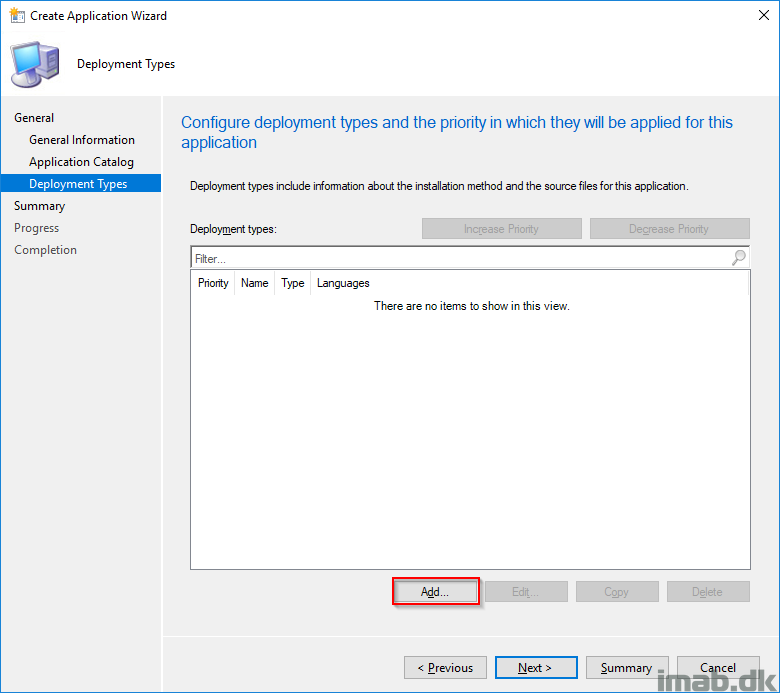
- Add a new deployment type

- Select Script Installer from the drop down menu and click Next
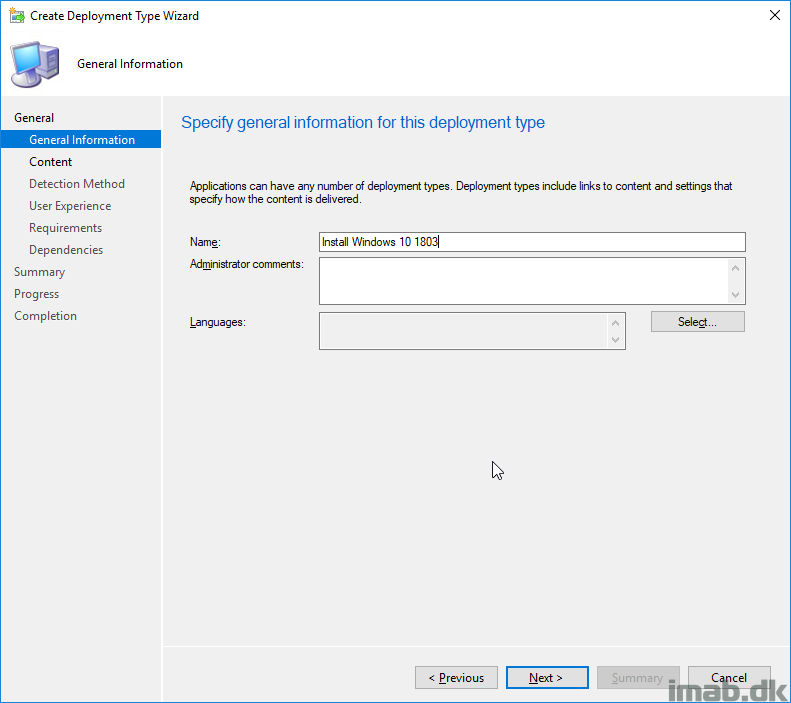
- Give the Deployment Type a name and click Next
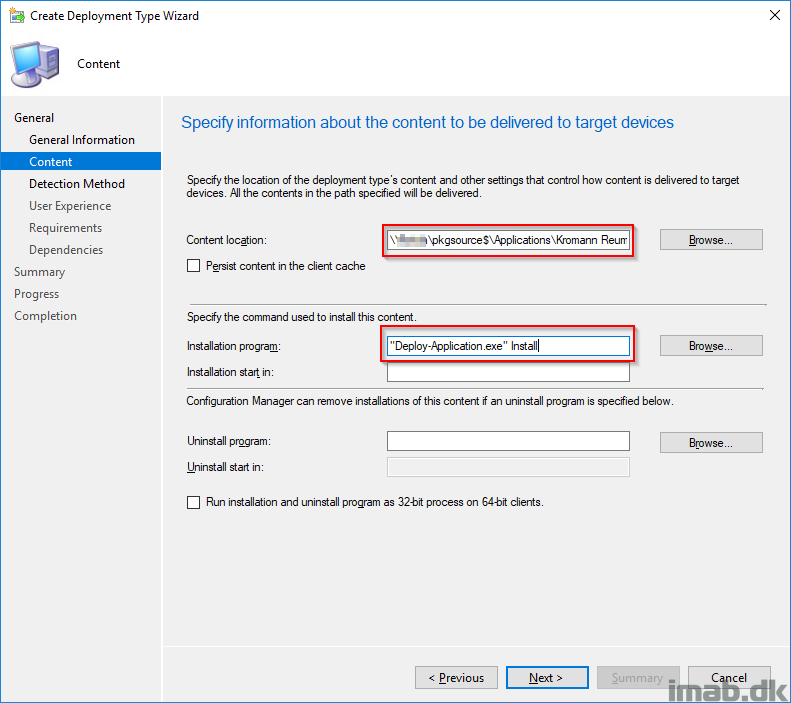
- Specify the Content location and Installation program as shown above
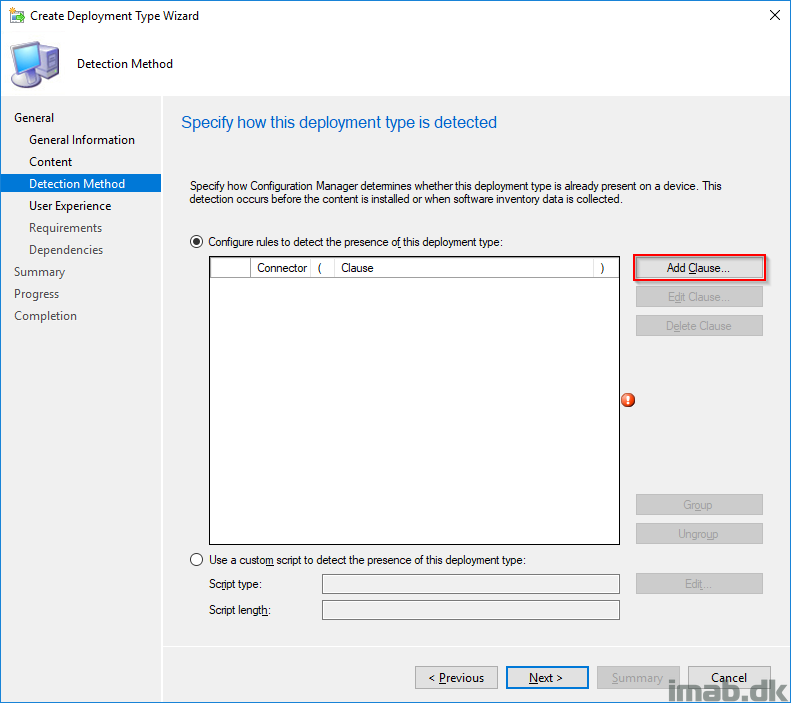
- Add a Detection Method on Add Clause
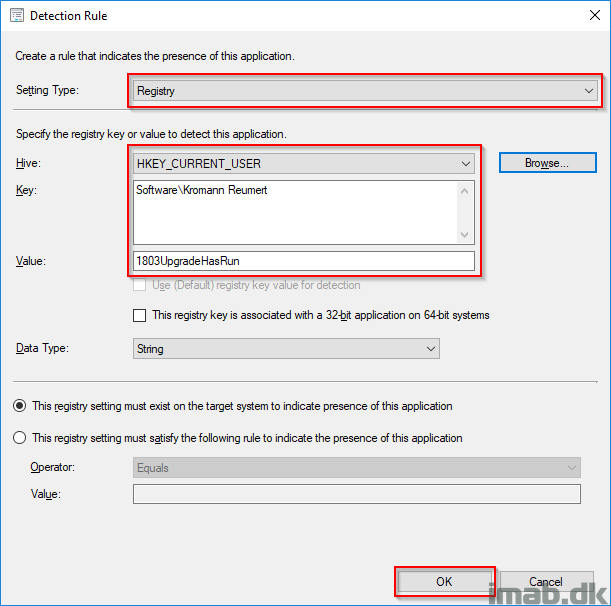
- The detection method is going to be Registry and will point to the registry key made by the Execute-OSUpgrade.ps1 script. Modify to suit your changes
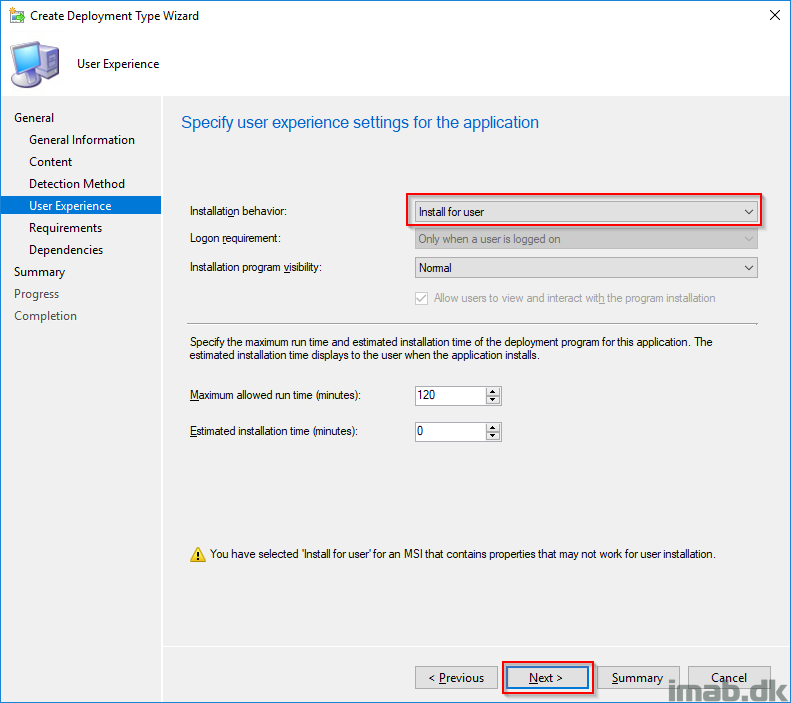
- Make sure that the application has an application installation behavior as Install for user. Finish the wizard on Next.
Deployment
It goes without saying, but the application you just created and the upgrade task sequence intended to run, needs to be deployed (both as available in this scenario).
This is all basic Configuration Manager, so I’m not going into details here. For your reference, the application is being deployed to a collection consisting of users, whereas the task sequence is being deployed to a collection consisting of computers. Key here is, that the task sequence is available for the users deploying the application. If the task sequence isn’t available, the installation of the application running the script, will fail.
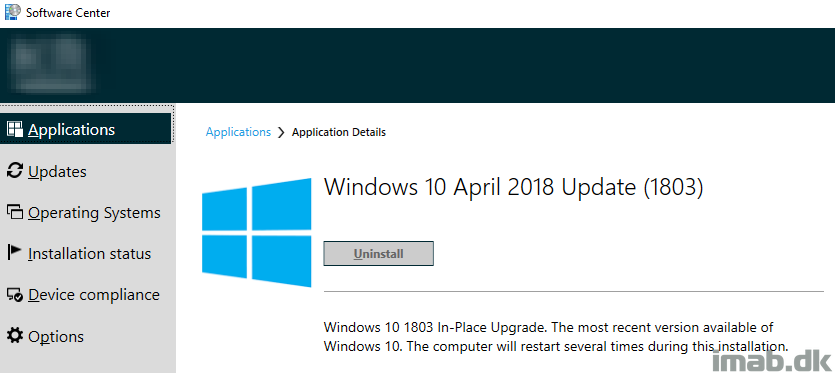
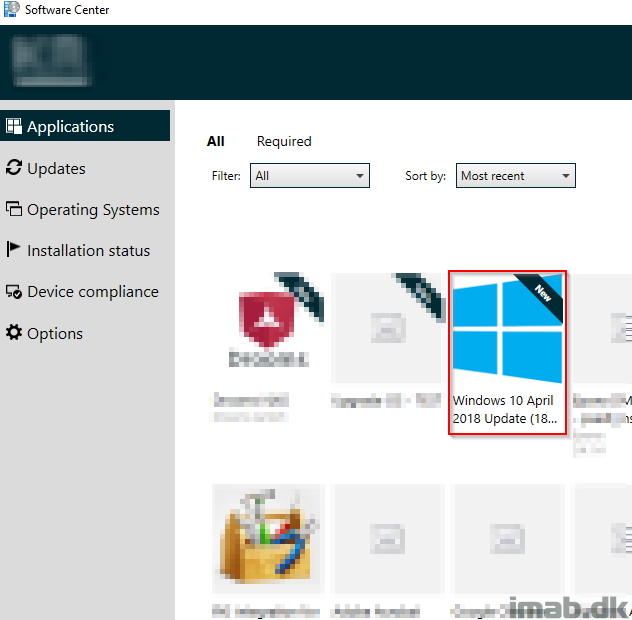
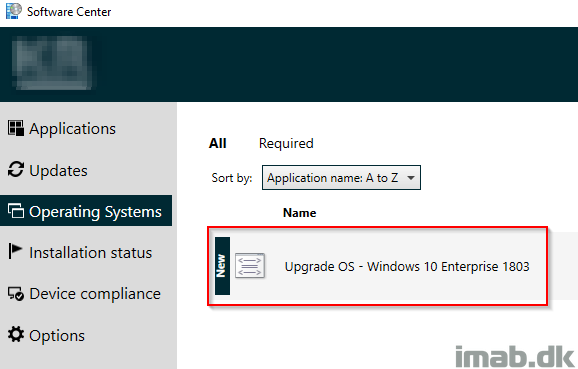
Your Software Center basically have to have both the application AND the task sequence shown as available. Something similar to this view:
End user experience
This illustrates how the experience is from an end users point of view.
- Manually clicking on the application in the Software Center (this can of course be a required deployment as well with a set deadline)
- Powershell App Deployment toolkit running with the chosen options
- Execute-OSUpgrade.ps1 being executed
- The upgrade task sequence being run and Windows 10 being upgraded
Final words
Using the Powershell App Deployment Toolkit gives you several advantages in ability to deferral, checking for disk space, checking for presence of powersupply and battery and adds a lot more visibility for the end user. I will walk through my upgrade task sequence in an upcoming blog post.
Please share and leave a comment if this was useful.
References:
https://gallery.technet.microsoft.com/scriptcenter/Write-Log-PowerShell-999c32d0
www.psappdeploytoolkit.com/
Awesone post! Have you tested the script in Windows 7?
Thanks! Unfortunately not. I’m in a Windows 10 only environment, but I don’t see why the script shouldn’t work on Windows 7 as well 🙂
Just to add on this wonderful blogpost. The PS App Dep Toolkit has builtin check to ensure the the computer has a power adapter attached and it’s has a LAN/wired connection. However, the “Test-NetworkConnection” isn’t always super reliable – so test in your own environment.
Code if needed (sorry for the spaghetti):
#Test if virtual machine
$ModelType = Get-WmiObject -Class Win32_ComputerSystem | Select-Object -ExpandProperty Model
if($ModelType -ne “Virtual Machine”){
##
#Check for power connected
Test-Battery
$testbat = Test-Battery
if(!$testbat){
Show-InstallationPrompt -Title ‘Strømstik mangler’ -Message “Installationen kunne ikke finde et tilsluttet Strømstik.`n`nTilslut venligst et Strømstik og tryk: Prøv igen” -Icon ‘Exclamation’ -Timeout 300 -MinimizeWindows $True -MessageAlignment Left -ButtonRightText ‘Prøv igen’
$testbat2 = Test-Battery
if(!$testbat2){
Show-InstallationPrompt -Title ‘Strømstik mangler’ -Message “Installationen kunne igen ikke finde et tilsluttet Strømstik.`n`nOpgraderingen afbrydes.” -Icon ‘Exclamation’ -Timeout 300 -MinimizeWindows $True -MessageAlignment Left -ButtonRightText ‘Øv’
exit
}
}
# Check for wired-network
Test-NetworkConnection
$testnet = Test-NetworkConnection
if(!$testnet){
Show-InstallationPrompt -Title ‘Netværkskabel mangler’ -Message “Installationen kunne ikke finde et tilsluttet netværkstik.`n`nTilslut venligst et netværkstik og tryk: Prøv igen” -Icon ‘Exclamation’ -Timeout 300 -MinimizeWindows $True -MessageAlignment Left -ButtonRightText ‘Prøv igen’
$testnet2 = Test-NetworkConnection
if(!$testnet2){
Show-InstallationPrompt -Title ‘Netværkskabel mangler’ -Message “Installationen kunne igen ikke finde et tilsluttet netværkstik.`n`nOpgraderingen afbrydes.” -Icon ‘Exclamation’ -Timeout 300 -MinimizeWindows $True -MessageAlignment Left -ButtonRightText ‘Øv’
exit
}
}
}
Thanks Bo for the additional information. I will add that as an option to my example asap 🙂
How do you change the “wallpaper” as seen in your GIF animation?
It’s some custom powershell. I’ll share it asap 🙂
wow.. nice
I will look forward to that 🙂
Great blog.
One thing I would change is the registry tattooing. I would create that registry key at the end of the task sequence if this was successful. In this way you can re-run the application if the TS fails to upgrade the OS.
That’s actually not a bad idea. I think I came across that myself but hated that the application will fail. I might reconsider actually. Thanks 🙂
Hello,
First thanks you this very great tool for the upgrade in place.
In your video, i see “Windows is beiing upgraded ..” in full screen. I try to create this in XAML but it’s very difficult for me.
Can you please share this code ? save me a lot of time for my project.
Thanks you very much in advance and sorry for my english i’m french.
Look here for custom spash screen : https://smsagent.wordpress.com/2018/08/21/create-a-custom-splash-screen-for-a-windows-10-in-place-upgrade/
***Hope it’s okay that I link to another blog ? (It’s not my blog )***
Sure, no problem. Trevor makes some cool stuff which I use myself as well 🙂
You create the PSAD as a application and in the box you say ‘if you click No it will retry in 2 hours’. It’s not possible to rerun an application at a set schedule of 2 hours so how did you get the 2 hours to work? Is 2 hours the period in which SCCM checks if a required application is installed and if not retries the installation and thus shows the PSAD again?
Also… if a user refuses to attach the power adapter nothing actually happens after clicking retry and OK. Isn’t it possible to create an infinity retry loop?
The retry behavior with the application model should retry the installation if it fails with error code 1618
I noticed when reading the updated blog. Thanks for the quick answer. We’ve been using the PSAD for quite a while now but I never thought of using it in ways like this. For our IPU we use OneVinn’s Windows 10 Upgrade Tools, but we ran into some challenges with systems not using the power adapter. Your post was of great use. Just trying to find a way to combine it all.
Thank you for taking your time to provide feedback and ask questions – much appreciated 🙂
A few days ago I asked if the check for the Power Adapter could be an infinity loop that the user couldn’t escape by just clicking Try Again or OK. With this code the Messagebox will keep popping up until the user really attaches a power adapter. No escape possible unless the user kills the running task.
#Check for connected power adapter
if($ModelType -ne “Virtual Machine”) {
Do {
$Testbat = Test-Battery
If(!$Testbat) {
Show-InstallationPrompt -Title ‘Power adapter missing!’ -Message “The installation was unable to find an attached power adapter.`n`nPlease attach a power adapter and click try again” -Icon ‘Exclamation’ -Timeout 300 -MinimizeWindows $True -MessageAlignment Left -ButtonRightText ‘Try Again’
}
}
Until($Testbat)
}
Credits to you for giving me the idea to use the PSAD Toolkit and to José Espitia for showing me how to correctly script a Do – Until loop. I am by no means a Powershell Guru 🙂
In our IPU I’ve implemented a step which checks if the system is running without power attached and if so it pops up a messagebox. The user can only continue with the IPU by attaching the power cord. Works like a charm.
Thank you for sharing that with me 🙂
I can’t thank you enough for posting your two articles on this, I was working on the exact same scenario with a similar PSADT script I created and was having trouble getting mine to run in a User context without admin rights and still being able to use Deferral…your methods helped me get mine working flawlessly, kudos!
Thank you! 🙂
Hi Martin, thank you for your work!
I am wondering though – if both App and TS are available, won’t it confuse Users? They can select a TS instead of the App… Are you hiding TS somehow?
Hi and thank you for reaching out. It think that will vary based on the curiosity and level of skill of the individual user. You can reference the application directly using the URL. You never have to make the user aware of the actual TS. Also, I reference the application directly using a toast notification, so the user is never seeing the actual task sequence in this case 🙂
Hello Martin
first of all, thank you so much for this script, it is exactly what i was looking for.
unfortunately, i have a little error when launching it.
it throws an error at line 107:
$softwareCenter.ExecuteProgram($taskSequenceProgramID,$taskSequencePackageID,$true) | Out-Null
the error is:
An HRESULT E_FAIL error has been returned from a call to a COM component.
+ $softwareCenter.ExecuteProgram($taskSequenceProgramID,$taskSequencePa …
+ ~~~~~~~~~~~~~~~~~~~~~~~~~~~~~~~~~~~~~~~~~~~~~~~~~~~~~~~~~~~~~~~~~~~~~
+ CategoryInfo : OperationStopped: (:) [], COMException
+ FullyQualifiedErrorId : System.Runtime.InteropServices.COMException
in the logs, i see this before the error:
“Successfully connected to the Software Center”
and this one after the error:
“Task Sequence was successfully executed”
the registry keys “1803UpgradeHasRun” and “1803RunDate” are correctly created
the Task Sequence runs normally when i launch it via SCCM
If you can help me, that would be great.
many thanks =)
Uhm, I’m not sure. I would try to verify that the TS indeed is available in the Software Center and then run those lines executing the TS separately (don’t run the entire script). Does that work?
If that doesn’t work, I have another method for running the Task Sequence via WMI. Let me know.
Hello Martin
I was running the deployment in system context and not user context .
after a few changes, it’s working good now.
very nice script =)
do you know if it’s possible to modify the duration of the defer time ?
currently, it’s managed by SCCM who runs the deployment again when it fails but that config is fixed at 15 mins by my compny and i can’t change it because it will afect all the deployments in the console.
changing that setting only for this deployment would be great.
i’ve been told its not possible but maybe ther is some powershell trick to do it in PSAppDeploymentTool.
thank you so much for your help
Hello Martin
how are you ?
sorry to bother you again with my issues, but i don’t find anything as close to what i need than your script and i’m really bad a powershell.
is there a way to adapt these lines in order to execute an application instead of a tasksequence ?
thank you
”
# Name of the task sequence. Modify to suit your environment
$TaskSequenceName = “Upgrade OS – TEST”
## Get the Software Center
try {
$softwareCenter = New-Object -ComObject “UIResource.UIResourceMgr”
Write-Log -Message “Successfully connected to the Software Center”
}
catch {
Write-Log -Message “Cannot connect to the Software Center.”
exit 1
}
$TSReferencePackageIDs = @()
# Get the Task Sequence object
$taskSequence = $softwareCenter.GetAvailableApplications() | Where-Object { $_.PackageName -eq “$TaskSequenceName” }
if ($taskSequence) {
$taskSequenceProgramID = $taskSequence.ID
$taskSequencePackageID = $taskSequence.PackageID
foreach ($i in $taskSequence.GetMemberPrograms()) {
$TSReferencePackageIDs += $i.PackageID
}
}
else {
Write-Log -Message “Failed to retrieve the Windows 10 upgrade from the Software Center.”
exit 1
}
# Execute the task sequence
$softwareCenter.ExecuteProgram($taskSequenceProgramID,$taskSequencePackageID,$true) | Out-Null
“
Yes, there is. I haven’t blogged it specifically, but my toast notification script is capable of running applications. If you grab the code from that script and merge into what PSADT does, it’s doable. Also, take a look at this post: https://www.imab.dk/enhance-your-windows-as-a-service-process-use-toast-notifications-and-powershell-app-deployment-toolkit-to-upgrade-windows-10/
That’s great, thank you, it will help me a lot.
i looked at all your posts and found some very usefull but i’m looking for a specific funcion i have trouble finding.
Currently, when a user defers an install, the application throws an error and stops until they hit the “retry” button (unless there is a fast retry but it’s really quick and i can’t change the time).
My idea (well i guess i’m not the first one haviing it =) )was that, when the “defer” button is pressed, the PSADT app would create a timer or a schedule in the windows scheduler or somewhere else and then retry automatically at the end of the timer.
does this kind of funcion sound familiar to you ?
i found one on internet but my tests were not really promising
https://discourse.psappdeploytoolkit.com/t/function-to-trigger-and-application-evaluation-cycle-after-a-specified-time/552
Thank you
Curious as to why you created a separate file to execute the task sequence rather than running the commands inside the PSADT script?
As you also able to share you In Place Upgrade task sequence?
I’ve shred that already. I lie to keeo those things separate. Also easier for anything to edit, replce and what if it’s in a file and not inline in the script