Introduction
More Configuration Manager 1806 and more awesomeness. 1806 gives us additional improvements to the Cloud Management Gateway and removes the need for PKI in your environment. With these improvements, it has never been easier to setup the CMG. In this post I will walk you through the exact steps I went through in order to successfully deploy the CMG in a HTTP only environment.
Configuration Manager
Most of the doing is happening from within the Configuration Manager console.
Client Computer Communication
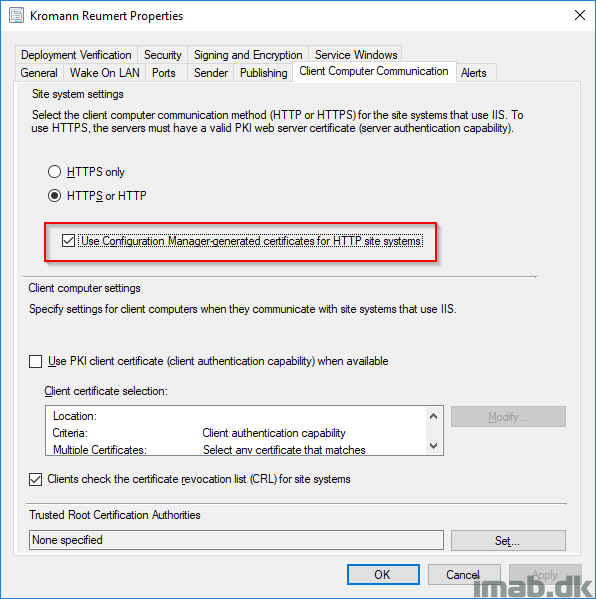
- First step is to enable “Use Configuration Manager-generated certificates for HTTP site systems“. This is done in the Administration work space, Site Configuration, Sites and Properties of your primary site as illustrated below. As you also notice, this site is running HTTP without PKI certificates.
- ATTENTION: This requires the pre-release feature: “Enhance HTTP site system” to be turned on!
Azure Services
- Next is to configure the relevant Azure Service also in the Configuration Manager console, Administration work space, Cloud Services -> Azure Services.
- Select Cloud Management and give it a suitable name.

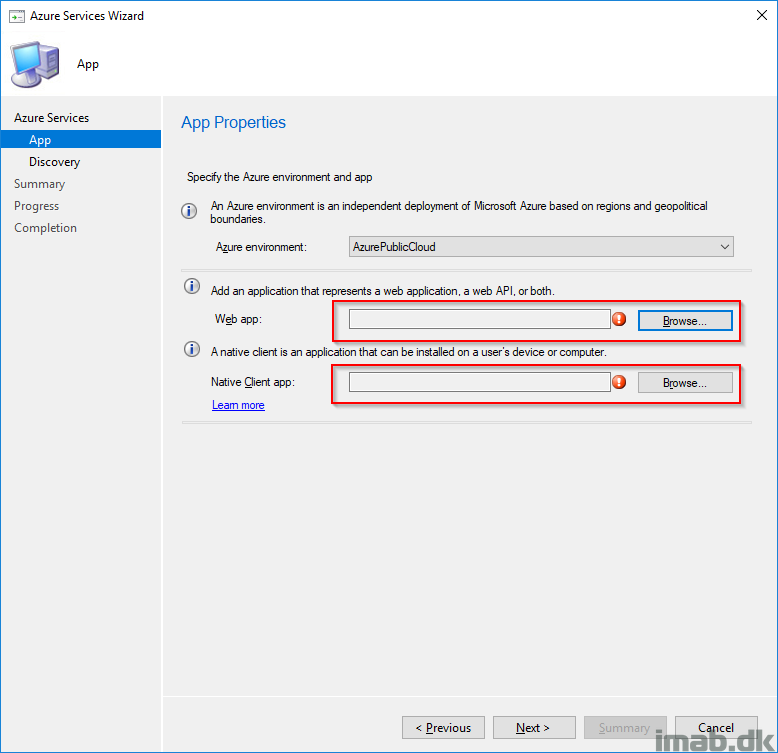
- Create the two applications highlighted below. Note: If you already have the web app created, the wizard will prompt you to reuse the existing. Chances are that you already have Microsoft Store for Business configured in Configuration Manager. If that is the case, you will have the web app already.
- The defaults for creating the apps can be used. Nothing but the names are required.
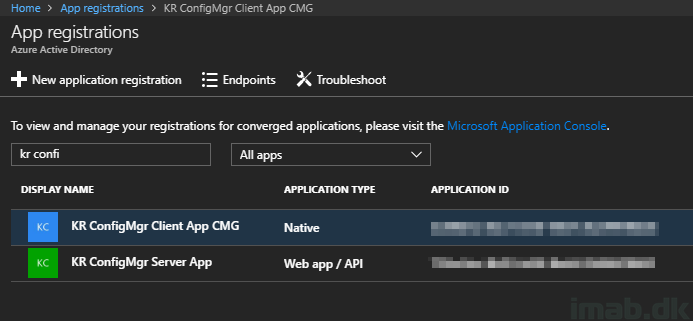
- For your inspiration, my Cloud Management Azure Service looks like this:
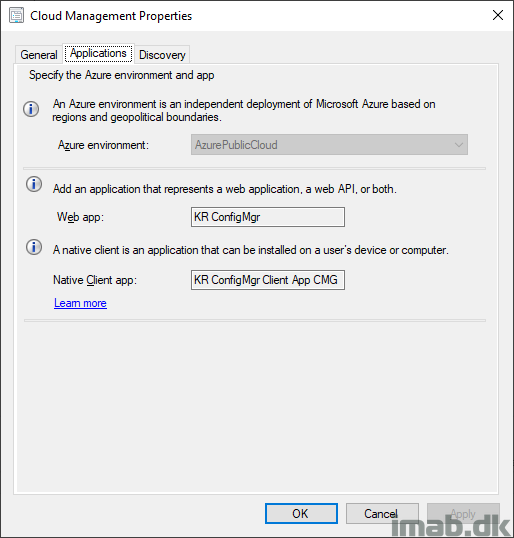
- Which in return will create the two same apps in Azure with the same names:
Cloud Management Gateway
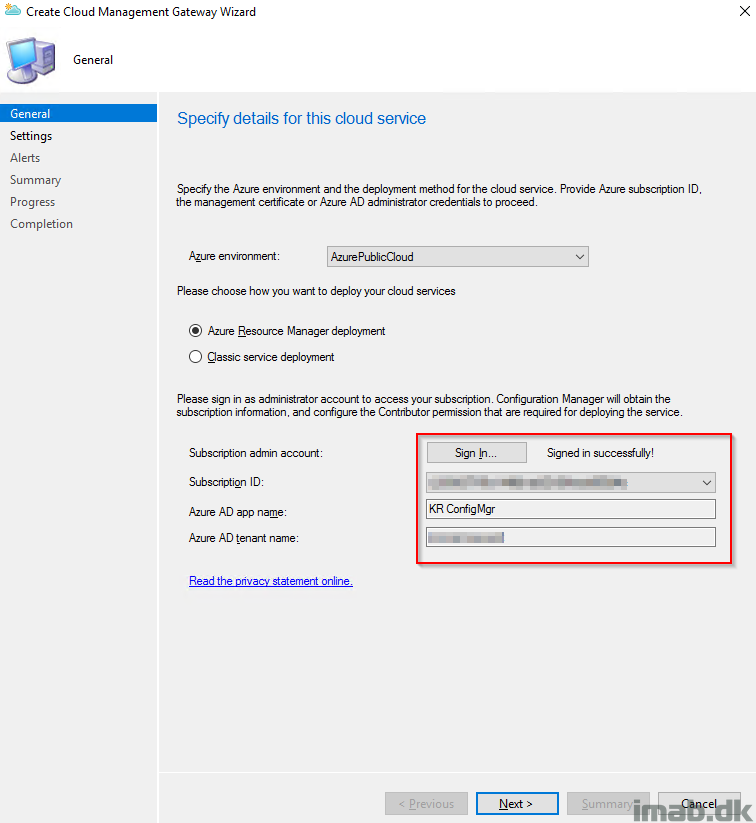
- Next up is adding the actual CMG. Here you need to sign in to Azure with an subscription administrator. The selection here will be the Azure Resource Manager deployment.
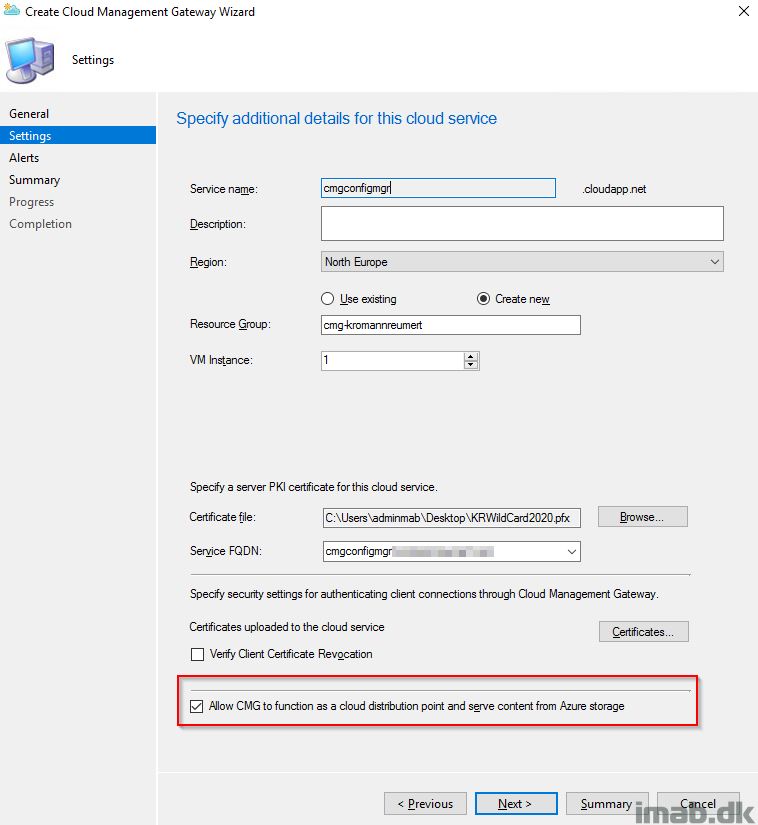
Next step is probably the most advanced step of them all (which in fact is quite simple). This is the part where you have to upload the one and only certificate used for configuring all of this, and decide for some of the settings for the CMG in Azure.
- Certificate file: This is the server authentication certificate, and in my scenario a certificate issued by a public provider like DigiCert, Thawte or VeriSign.
- Service FQDN: In this scenario I have selected cmgconfigmgr.mydomain.com matching the domain in the certificate. This is a name that you decide for yourself and can be anything (almost).
- Service name: The service name will be populated once above is in place. Note that the Service name has to be unique, as this will be a part of the cloudapp.net domain.
- Resource Group: I’m creating a new resource group in Azure.
- Allow CMG to function as a cloud distribution point: Yes please, you would want to have this, as this will save you the trouble and money for having a cloud DP separate from the CMG.
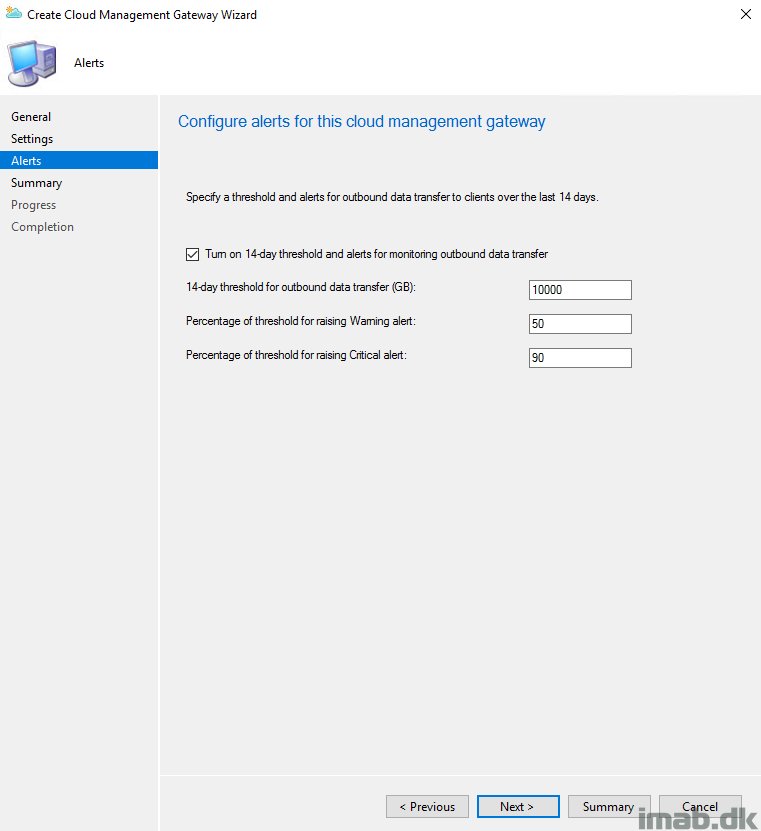
- For now, I just accepted the defaults on the Alerts page and finished the wizard.
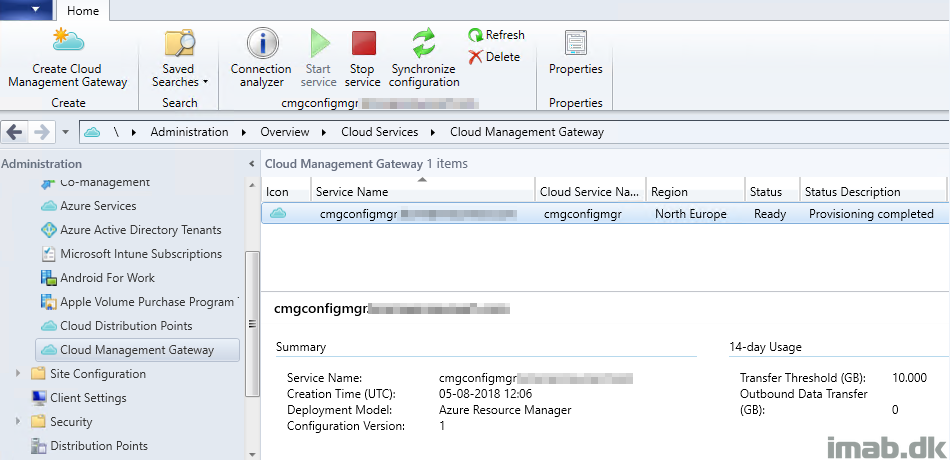
- Before I moved on to the next steps, I made sure that the CMG had a status of Provisioning complete as shown below. It might take a few minutes to complete. Patience.
- The log files CloudMgr.log and CMGSetup.log on the site server is of interest to monitor during this phase of the setup.
Cloud Management Gateway Connection Point
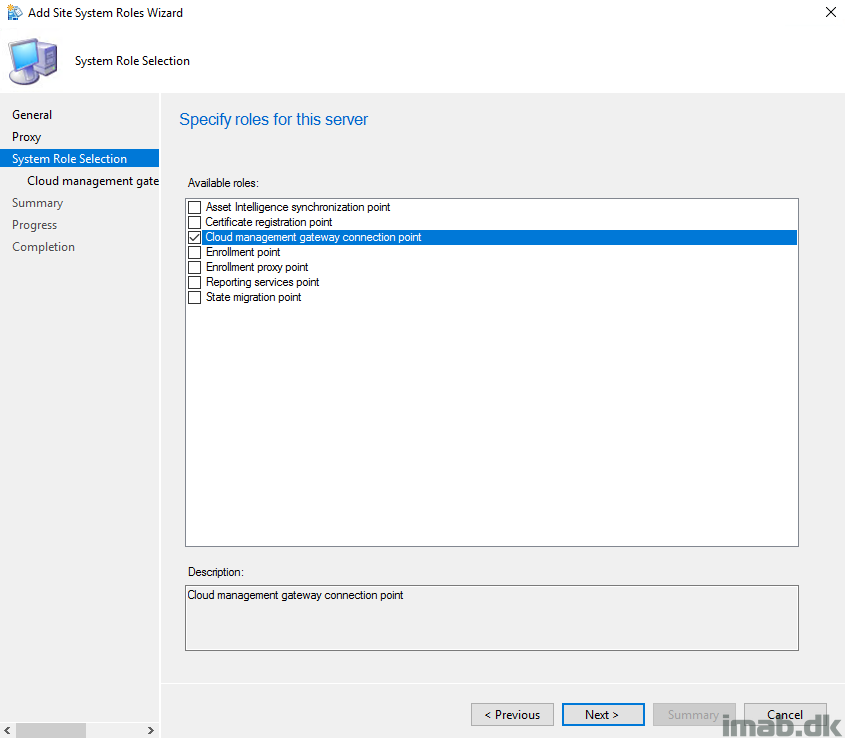
- Add the Cloud Management Gateway Connection Point site system role. I have chosen to add this on my primary site server, but this can be any site server you like.
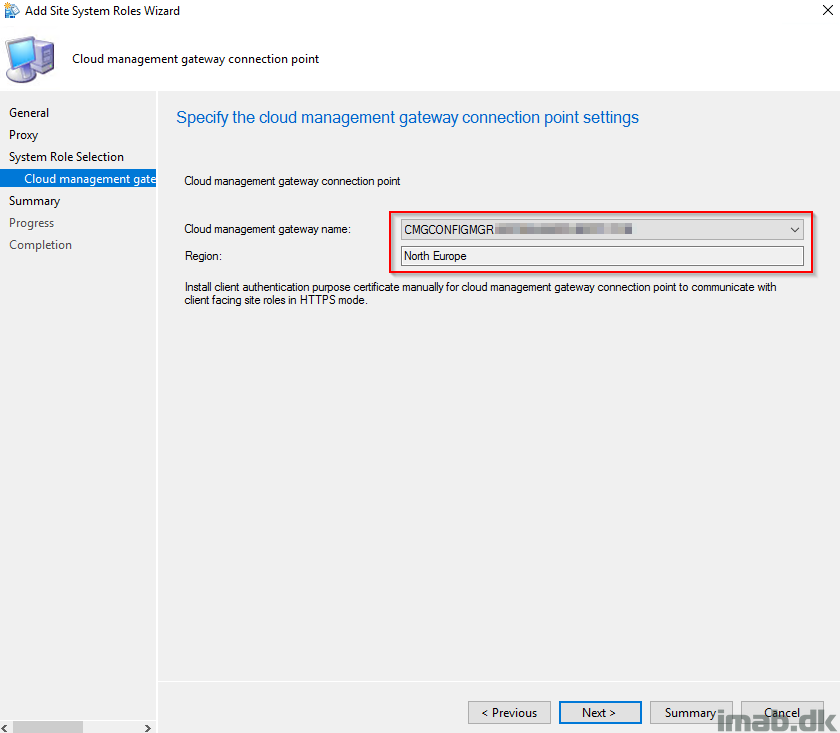
- With everything else mentioned in this post completed, the cloud management gateway name will automatically be filled out as shown below.
Allow cloud management gateway traffic
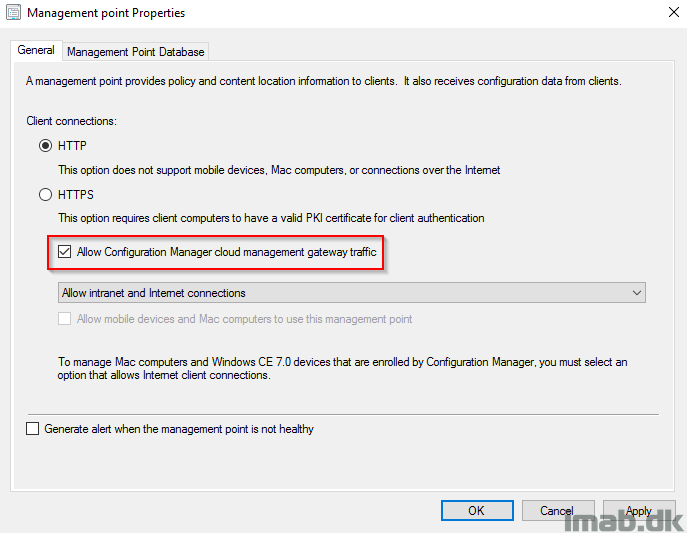
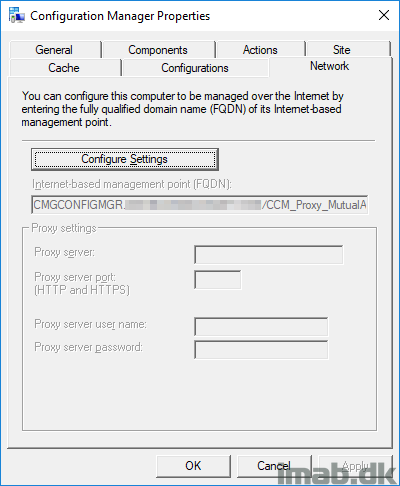
- Next, make sure that your management point has following setting enabled, and thus allows the MP to have both intranet and Internet connections.
Client Settings
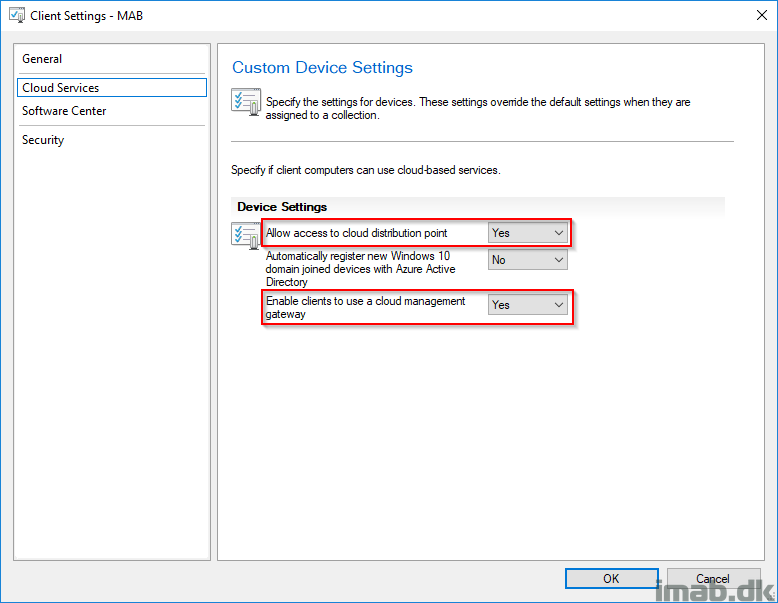
- Make sure to have these settings in your Client Settings set to Yes and the Client Settings deployed to your clients.
- Consider having the these enabled in the Default Client Settings, as a client being installed from the Internet never receives the custom Client Settings if the CMG is disabled in the Default Client Settings,
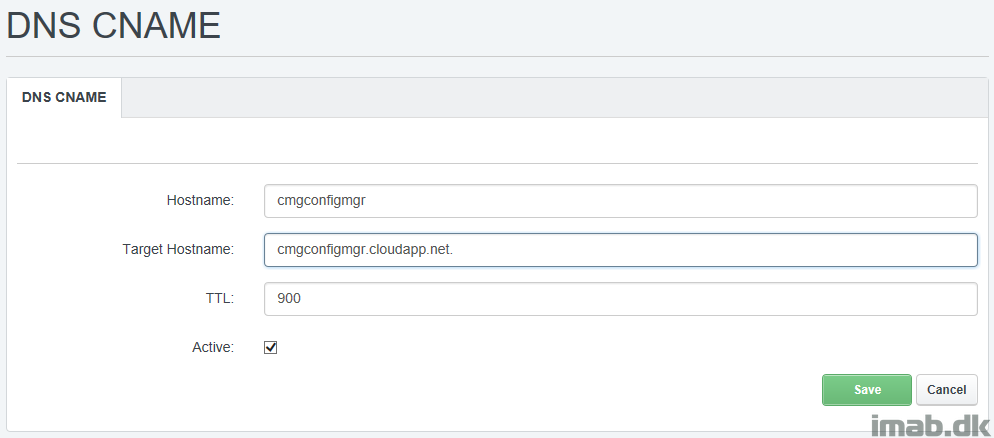
DNS CNAME
All of this awesomeness requires that you create a CNAME in your organizations public DNS.
In this scenario, that will be cmgconfigmgr.mydomain.com pointing to cmgconfigmgr.cloudapp.net. Remember that this may take a while to replicate across the globe to all DNS servers.
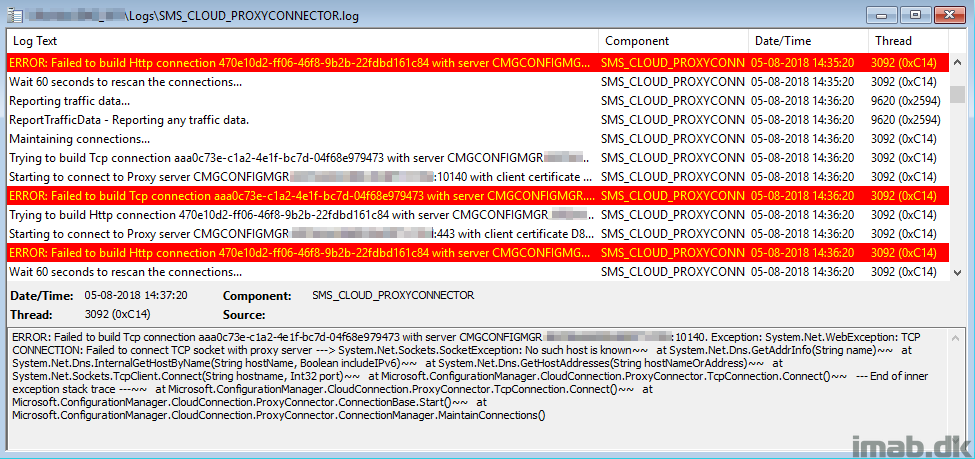
Note: If something in the DNS alias is not working properly, you will find similar entries to this in the SMS_CLOUD_PROXYCONNECTOR.log on the site server.
Testing
You can force the client to always use the CMG regardless of whether it’s on the intranet or internet. This configuration is useful for testing purposes, or for clients at remote offices that you want to force to use the CMG. Set the following registry key on the client:
HKEY_LOCAL_MACHINE\SOFTWARE\Microsoft\CCM\Security, ClientAlwaysOnInternet = 1
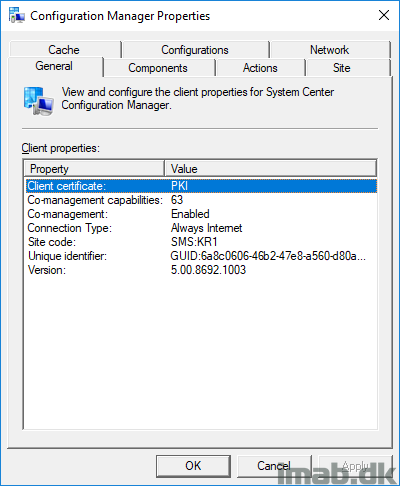
Verify that the client is on Internet through the Configuration Manager applet in the control panel:
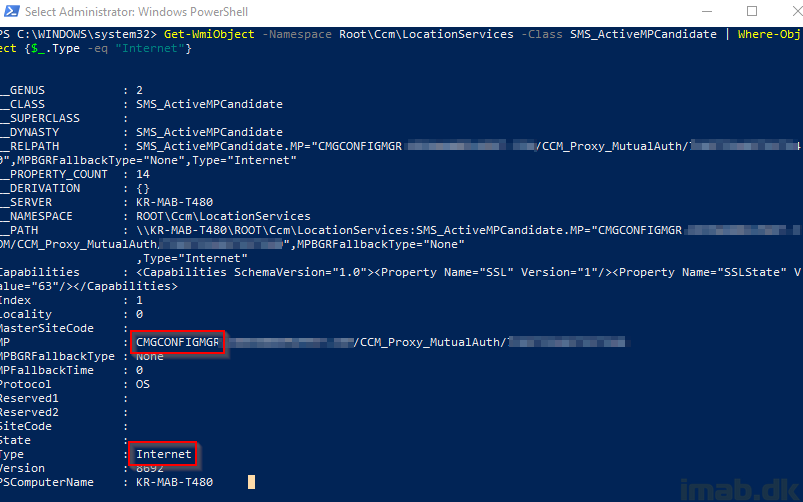
And run following powershell line to verify that the CMG is available as Internet management point:
Get-WmiObject -Namespace Root\Ccm\LocationServices -Class SMS_ActiveMPCandidate | Where-Object {$_.Type -eq "Internet"}
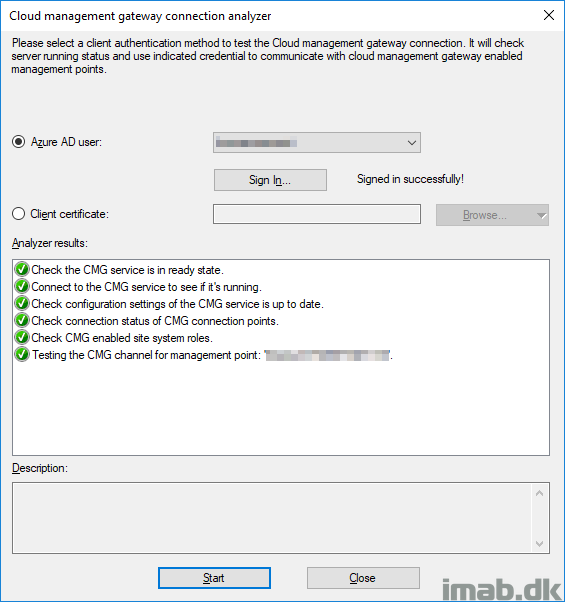
Running the Cloud Management Gateway connection analyzer:
ENJOY 🙂
More info:
https://docs.microsoft.com/en-us/sccm/core/clients/manage/cmg/plan-cloud-management-gateway
To get the “Use Configuration Manager-generated certificates for HTTP site systems“ setting to appear you must enable “Enhanced HTTP Site System” Pre-release Feature in 1806.
Hi, that’s correct – thanks for pointing that out 🙂
Hi,
We configured Cloud Management Getway as the instructions above (as HTTP mode)
But when we check on computer that is “Currently Internet” We still see in the Client Certificate: Self-Signed.
any ideas?
Thanks,
Sagiv
Hi, that’s expected as the certificate indeed is self-signed when using the configmgr generated certificate option 🙂
My clients cannot connect however the CMG seems to be working great. I see connection issues from the client. Do you have any SAN on the one cert you used to create the CMG? What assumptions should be made regarding the current environment before going through these steps?
If an azure ad joined device goes onto the LOCAL Network, will it still be able to communicate with a HTTP management point?
Thankyou for the great guide Martin.
Can you help me I am stuck at the very first part.. I do not have a tick box in that screen saying “Use Configuration Manager-generated certificates for HTTP site systems”. I am running 1806 so expected to see it. My screen looks exactly the same without the tick box option.
Do you think I need to add the site system role “cloud management gateway connection point” in order to get this?
Many thanks
Appologies i see someone else answered this.. please ignore me.
No worries – I should really update the post with the addition – thank you 🙂
Does this work with on prem domain joined clients?
Short answer, yes. Hybrid joined (which is also joined to on-prem AD) is required when no PKI certs is being used, as the Azure AD identity is used instead to communicate with the CMG 🙂
Just wanted to say thankyou for your guide Martin, it really helped me get the gateway working in my environment and as I work for a charity its saved money on a consultant to get this in. I did some testing with the gateway in place and I would add in order to manage windows updates on the remote machines I also had to:
— Go to the “software update point” settings
– Ticked -> Allow configuration manager cloud management gateway traffic
– Ticked -> Allow intranet and internet client connections
Quick question if you dont mind in my testing ive proven the gateway helps me:
– push windows updates
– push applications
– power the software center so users can download published applications
– get alerts when virus is found on the remote machine
However if you try in the console to run a endpoint protection “full scan” or “quick scan” through the sccm console to the remote machine it seems to run but on the remote machine “Windows Defender Security Centre” console it still says the last scan was yesterday rather then today.
Just wondered if this should work or not based on other people’s experiance?
Thanks
Richard
Hi Richard, you are most welcome.
In regards to the SUP settings, that sounds about right and thanks for pointing that out. I wouldn’t leverage the internal SUP for internet-based clients though. I would simply allow them to download the updates directly from Microsoft or use Windows Update for Business with Intune. No need to pay for extra costs in moving those bits back and forth imo 🙂
I haven’t tested the endpoint protection features, so I cannot comment on that yet 🙂
hi,
Primary stand alone site here with 40+ remote DPs..
I can’t see in your guide the below role being enabled, but should it be?
“cloud management gateway connection point”
Hi, I do mention the gateway connection point role and yes, that is needed as well 🙂
Hello,
Just confirming that the public cert would be a paid Standard SSL cert from somewhere like DigiCert?
Thank you
Correct, matching your domain. 🙂
can we use it to set up the GMA with out-of-domain computers with a public certificate ?
sorry with CMG
hi ,
is there way of generating client certificate from the Wildcard certificate which i got from public authority.
my clients are showing self-signed cert not PKI . and am struggling to solve this
Thank you! I fixed!
After I did this configuration my Task Sequences stopped working. Every time I try to make an image on premise I get this error;
Log Name: Microsoft-Windows-Deployment-Services-Diagnostics/Admin
Source: Microsoft-Windows-Deployment-Services-Diagnostics
Date: 1/6/2015 6:24:47 AM
Event ID: 4101
Task Category: None
Level: Error
Keywords: (4)
User: SYSTEM
Computer: server.domain.local
Description:
The Following Client failed TFTP Download:
Client IP: 10.xx.1.xx
Filename: \SMSImages\P0100005\boot.P0100005.wim
ErrorCode: 1460
File Size: 236655538
Client Port: 11245
Server Port: 59308
Variable Window: false
Event Xml:
4101
0
2
0
0