New PXE deployments: “Skipping Task Sequence because it is not active yet”

I just updated to Windows 10 ADK and was eager to start building my new Windows 10 image.

So I created brand new WinPE10 boot images (x64/x86), deployed them to my DP’s and PXE points. Imported the new OS into SCCM and created my build and capture TS and deployed it to my BuildCapture collection. I booted my VM and noticed my new task sequence wasn’t on the list. I did another reboot just to make sure the new policy was downloaded, but no. Still no W10 build and capture task sequence.

Having a look at the SMSTS.log revealed following: “Skipping Task Sequence because it is not active yet”

Seems like the time is a bit off when deploying with a default available schedule of now. I had to edit the deployment and set the date/time a few days back for the TS to show up. (This is CM 2012 R2 SP1)


KB3025417 breaks SCEP reporting (and the solution)

Beginning of June I had my ways with a problem in SCCM/SCEP and the update KB3025417.

I did what I usually do in those situations. I went to the forums, and created following thread: Here!

After fighting with MS 1st line support and not really getting anywhere, then sudden following blog pops up at the ConfigMgr team: Here!

They came up with an alternative solution, which is what I was looking for. However, running W81 x64 and looking to push the mentioned script using ConfigMgr, comes with following obstacles:

  • Packages in SCCM is being launched as a 32bit process. (This is what most people would use, considering that it’s a script and most would use .bat/cmd)
  • The provided script cannot run under a 32bit process. (I learned so the hard way. I confirmed that the script worked when run manually. I took it for granted that it worked as a SCCM package as well – it doesn’t)

So the solution to this is either of following:

  • Use the application model. (Not really prefered in this case, as it requires a detection method)
  • Trick the file x64 redirection to run cmd.exe from %SystemRoot%\Sysnative

An example of the last mentioned solution could be this batch script:

“C:\Windows\Sysnative\cmd.exe” /c “%~dp064bit.bat” (This coming from a x86 process, will run 64bit.bat in a x64 context instead)

64bit.bat will then contain the original script.

No task sequences available – error 80004005

So, I just had a computer denying to have any available task sequences, with the excuse of following error: Failed to get client identity (80004005)

A quick peak into smsts.log was showing below error as well:

NoTaskSequence 

Turns out the date and time in BIOS was off. I corrected the date and time, and all task sequences was available again.

Software Updates and KB3000850 (failed installing updates with error 0x8024000b)

Microsoft just released a major update for Windows 8.1 and Server 2012 R2. A so called Update Rollup for November 2014: https://support.microsoft.com/kb/3000850

KB3000850 is treated as any other updates, and is being downloaded and deployed with my Configuration Manager 2012 environment.

Doing so out of the box was however not without obstacles. The updates is classified as a regular update, and therefore has a max. runtime set to 10 minutes.

Deploying the update as it is, was resulting in a failed status, and this in the WindowsUpdate.log:

WARNING: WU client failed installing updates with error 0x8024000b

This translates into maximum runtime exceeded, so you will have to go ahead and change that.

MaxRuntime

The update has a size of a service pack, so I allowed 60 minutes just be sure.


Troubleshooting boundaries and content download

I’m currently investigating some potential boundary issues related to the use of AD sites. Therefore I was looking for some more details on how content download is behaving considering slow and fast links in the environment.

This is some of the tests I did and the results thereof:

Action: Deploying software-package as available to a client which is within a slow boundary.

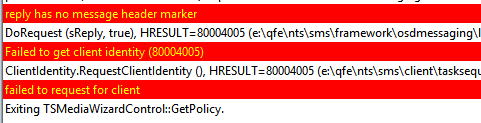
Result: Policy is received and entry in Software Center visible. Launching the installation gives following entry in the execmgr.log:

Action: Change the deployment options to Download content from distribution point and run locally when the client is within a slow or unreliable boundary. Refresh machine policy, and run the installation from Software Center again.

Result: This time execmgr.log immediately respondend with a successful content request.

execmgr

And while digging further into LocationServices.log, do notice following entries:

Distribution Point=’http://DP1.MYDOMAIN.COM/SMS_DP_SMSPKG$/KR1002C4′, Locality=’REMOTE’, DPType=’SERVER’, Version=’7958′, Capabilities='<Capabilities SchemaVersion=”1.0″><Property Name=”SSLState” Value=”0″/></Capabilities>’, Signature=’http://DP1.MYDOMAIN.COM/SMS_DP_SMSSIG$/KR1002C4′, ForestTrust=’TRUE’,
Distribution Point=’http://DP2.MYDOMAIN.COM/SMS_DP_SMSPKG$/KR1002C4′, Locality=’REMOTE’, DPType=’SERVER’, Version=’7958′, Capabilities='<Capabilities SchemaVersion=”1.0″><Property Name=”SSLState” Value=”0″/></Capabilities>’, Signature=’http://DP2.MYDOMAIN.COM/SMS_DP_SMSSIG$/KR1002C4′, ForestTrust=’TRUE’,

Locality=’REMOTE’, which identifies the client as being in a slow and unreliable boundary, which in this case is very true, but the software deployment is still running because of the change of options on the deployment.

When a client is within a fast and reliable boundary of the site, the entry would look like this, as in the locality of the client is local.

Distribution Point=’http://DP1.MYDOMAIN.COM/SMS_DP_SMSPKG$/KR1002C4′, Locality=’LOCAL’, DPType=’SERVER’, Version=’7958′, Capabilities='<Capabilities SchemaVersion=”1.0″><Property Name=”SSLState” Value=”0″/></Capabilities>’, Signature=’http://DP1.MYDOMAIN.COM/SMS_DP_SMSSIG$/KR1002C4′, ForestTrust=’TRUE’,

Client logs to consider when troubleshooting boundaries and content download:

execmgr.log
ClientLocation.log
LocationServices.log

Default Search Provider – Internet Explorer

Making Google the default search provider in Internet Explorer during OSD, is no trivial task. For many years, I have done so using an answer file to the Apply Operating System step in the task sequences.

And so, it was no different when I recently rebuilt our Windows 8.1 image:

GoogleXML

Above config of the answer file would previously remove the bing search engine, and replace it with google. Notice the ScopeDefault being set to true.

Something has changed though, and Bing now remains as default in Internet Explorer, but Google is however added. Strange.

I’m currently still looking into why the behaviour has changed, but until then I decided to go with a workaround. Forcing the search provider to be set to Google using a custom group policy.

Configure following GPO: User Configuration -> Administrative Templates -> Windows Components -> Internet Explorer : Restrict search providers to a specific list.

With this in place, the only search providers available to Internet Explorer, will be those which is found in HKCU\Software\policies\Microsoft\Internet Explorer\SearchScope. However, you’re not allowed to edit the content of this part of the registry manually (or with commands). You will need a custom made group policy, and luckily you can find one here: download (I found this somewhere else, and edited if for my use. It had other search engines, as well as an outdated string for google)

Import it as always, and the result will be this:

DefaultGoogle

As the help text suggests, this will put the required registry entries in place, and with only Google selected, Google will be the only and therefore default. (As 99.9% of users would prefer. Except Microsoft employees)

Unlocking ConfigMgr 2012 objects

Hurray for powershell!

The ConfigMgr console crashes, and the objects you were working on are locked. For the next 30 minutes.

Since ConfigMgr 2012 SP1 we have following cmdlet to our rescue:

Unlock-CMObject -InputObject $(Get-CMTaskSequence -Name “Install Application – DocsCorp Apps”)

In this scenario I was working on a task sequence called Install Application – DocsCorp Apps, when my console crashed.

Connect to Windows Powershell through the ConfigMgr console to load the proper module, and use the above cmd to unlock the object.

Following cmds are available:

Get-CMApplication
Get-CMPackage
Get-CMDriverPackage
Get-CMOperatingSystemImage
Get-CMBootImage
Get-CMTaskSequence

Managing workgroup/DMZ clients with ConfigMgr

For security reasons, we have decided to join specific computers, serving a specific role to a workgroup instead of our domain. While being in a workgroup in the DMZ, we still had the need to manage them using ConfigMgr.

I had no previous experience in managing DMZ workgroup computers, so I had to gather the required know-how.

This is what I did:

  • Listed the limitations regarding workgroup clients. (No Active Directory)
  • Created the proper boundaries for the workgroups clients. (If no boundaries are created, all clients will be considered as a slow client)
  • Made sure that port 80 (CM) and port 8530 (WSUS) are forwarded to through the firewalls to the new network.

As the workgroup clients are on their own network, and without DNS to give them information about which and where to locate a Management Point, we had to make following changes to the host files (C:\Windows\System32\drivers\etc) on the clients:

host1

lmhost1

With these changes in place, you can install the CM client with following commandline: “ccmsetup.exe” SMSSITECODE=SITECODE SMSMP=yoursccmserver.fqdn.com

If installing the client from an OSD task sequence, you cannot use the SMSSITECODE property (We have a seperate OSD TS for these clients joining a workgroup).

When the client is installed successfully, you will be able to see the client in the SCCM console. Note that the client is not automatically approved (This can be changed to automatically auto approve all sorts of clients, but is not recommended)

notapproved

After manually approving the client in the console, the client will start to download policies from the Management Point. (To speed up this process, you can restart the ccmexec service)

In the initial phase of getting this to work, it’s a really good idea to watch the proper log files, to see what actually happens, and in case of any errors, take the required actions.

These are some of the important client logs to consider:

LocationServices.log
ClientIDManagerStartup.log
Policyagent.log

Enjoy… 🙂

Tattoo and inventory the registry

OBS: This post is primary about how to tattoo the registry with any given information, and then inventory it with SCCM2012.

In need of knowing when a client got it’s OS intalled/reinstalled? Read further. There is no built-in feature in ConfigMgr, that quickly enables you to find that piece information, which basically means we have to make our own.

In following post I will explain what I do, using hardware inventory in ConfigMgr 2012.

First off, we have to make sure that the information we need, in this instance, the date of OS deployment is created during the actual installation. This can be achieved in various ways. I choose to add an entry to the registry.

Running following commandline from within your OS task sequence does just that:

reg add “HKLM\Software\COMPANYNAME” /v InstallDate /t REG_SZ /d “%date%”

RunDeployDate

With this in place, we have what we need on the clientside. The command will leave a trace of the actual date of when the computer got installed.

Now we need to tell ConfigMgr how to use this, and for this I use hardware inventory.

Hardware inventory means changes to the configuration.mof. Download and use RegKeyToMof will make your life easier on this one: Download here

What you basically need to do, is to browse your way to the registrykey you wish to inventory. In this case HKLM\Software\COMPANYNAME\ and check off InstallDate. RegKeyToMof will automatically generate the necessary snippet of code to be inserted into the configuration.mof file and for your Client Settings in the ConfigMgr console.

Configuration.mof:

configmof

Client Settings:

clientmof

Now update the client’s policy, run a new hardware inventory cycle and monitor the log files. InventoryAgent.log on the client, and dataldr.log on the server are relevant in this case. Datalgr.log vil start updating once the changes to configuration.mof has been done.

If everything goes as expected, you will be able to run a resource explorer on the client from the ConfigMgr console, and see something similar to this:

resourcexplor

And finally from here, you will be able to use this information in queries or even build a report, and this way locate clients which haven’t been reinstalled for a long period of time.

Enjoy.

BitLocker on Windows 8.1 and ConfigMgr 2012 R2

We have decided to encrypt our harddrives on our upcoming Windows 8.1 environment using BitLocker.

I had no previous experience with BitLocker, so I started out reading and learning and eventually got it to work. All the necessary information was spread across several TechNet articles, so I decided to put together a post explaining how I did it.

1) Fortunately for me, our domain is running on 2012 servers, so no need to extend the AD schema. You have to though, if you’re running 2003 domain controllers. Here’s something about the topic on TechNet: http://technet.microsoft.com/en-us/library/dd875529(v=ws.10).aspx#BKMK_3

2) What I had to do instead, was to verify that the schema objects was there, and delegate the correct permissions on the OU where my new Windows 8.1 computers are going to be. This is explained in details on TechNet as well. Here: http://technet.microsoft.com/en-us/library/dd875533(v=ws.10).aspx and here: http://technet.microsoft.com/en-us/library/jj592683.aspx#BKMK_addscons

3) Further to that, I configured BitLocker policy settings for the Windows 8.1 clients, enabling the TPM chip to backup BitLocker recoverykeys into AD. These are the exact policies that I apply to my Windows 8.1 OU:

  • Computer Configuration > Policies > Administrative Templates > System > Trusted Platform Modul Services:

TPMGPO

  • Computer Configuration > Policies > Administrative Templates > Windows Components > BitLocker Drive Encryption:

BitLocker

  • Computer Configuration > Policies > Administrative Templates > Windows Components > BitLocker Drive Encryption > Operating System Drives:

BitLocker2

4) Configuring the task sequence in ConfigMgr was pretty straightforward. 2012 SP1 has added support for pre-provisioning of BitLocker, which means SCCM will start encrypting the disk right after partitioning of the disks, and will be done with the image. Make sure the steps are exactly as on the picture.

BitLockerTS

5) Finally I installed the BitLocker Drive Encryption Administration tools on my DC’s, which enables me to view the BitLocker recoverykeys on the computer objects in AD.

BitlockerAdmin

6) Deploy the task sequence to the proper collection, and make sure the TPM chip is enabled in BIOS and you are set. (You can enable the TPM chip from within the task sequence using a script provided by Lenovo. I will update this post on how to do that ASAP. Download the scripts here: http://support.lenovo.com/en_US/downloads/detail.page?&LegacyDocID=MIGR-68488